One way to make your travel easy and stress-free is harnessing the power of travel apps. These 5 apps I recommend will lift the weight of your travel problems.
Humans have made it far enough.
Far enough that technology has touched our lives in all aspects of it- be it on health, finance, or agriculture. We have been more productive comparatively enough that technologies double the output and yet minimize effort.
One thing that technology has extremely helped us is when we travel. There are unique problems when traveling. You could get lost, confused, left out or get taken advantage of. These problems can waste your time and create chaos on your journey.
Geniuses explored solutions to these headaches. So, they developed travel apps.
Gone are those days flipping maps, wondering where should you be facing, or carrying 200-page dictionaries. Now, by the touch on the screen, you know where to head or how to translate some words for the local merchant you’re dealing with.
In fact, one can’t imagine how to travel easy peasy without using the power of these travel apps when everything’s connected now to the world wide web.
Yet, the awful caveat is that most apps out there are terrible, not working, or need some fees. You might overload your phone with apps that you don’t really need or apps that you have only used once. Some apps that invite you to download them could not work as you might expect, or are supposed to.
This selection of apps I recommend helps you avoid the painstaking process of choosing which apps to download for your next adventure. These apps are free, with many functions, and avoid redundancy. By downloading these apps, it’s guarantees you to save time and less the hassle.
To make sure we’re on the same page…
The apps that I recommend will help you is for during travels. Although the apps that mentioned in this blog have pre-travel functions (itinerary making, room reservations, etc.), the major part of this article talks about during your travels. You can read my “Planning to Travel? 11 Things to Consider to Ease Your Mind” blog for pre-travel plans.
Table of Contents
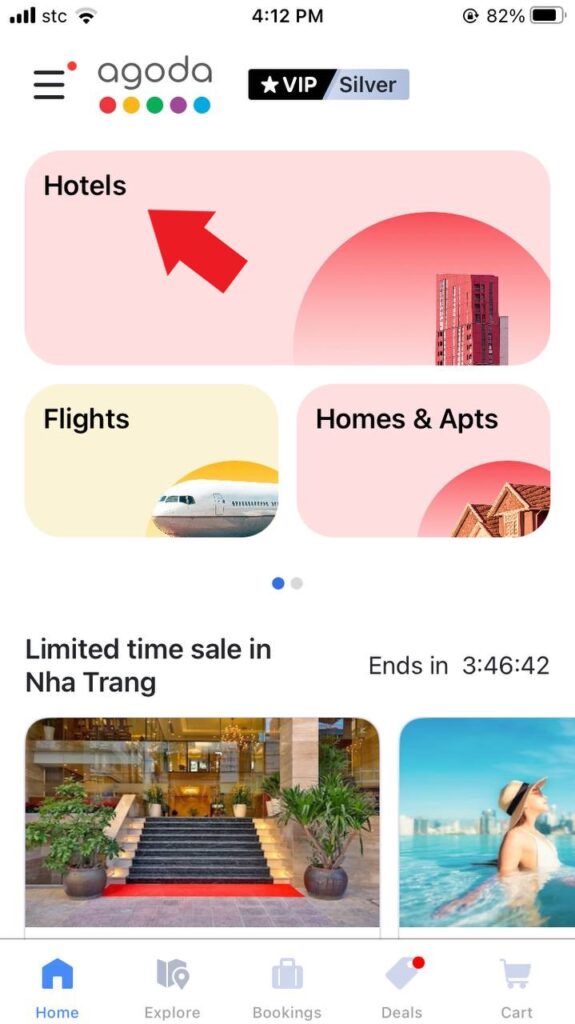
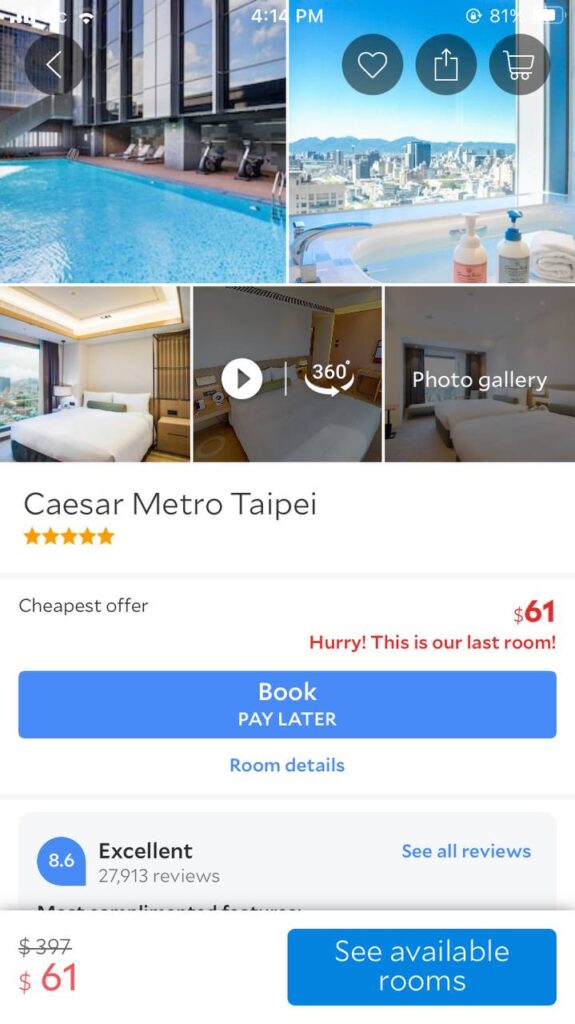
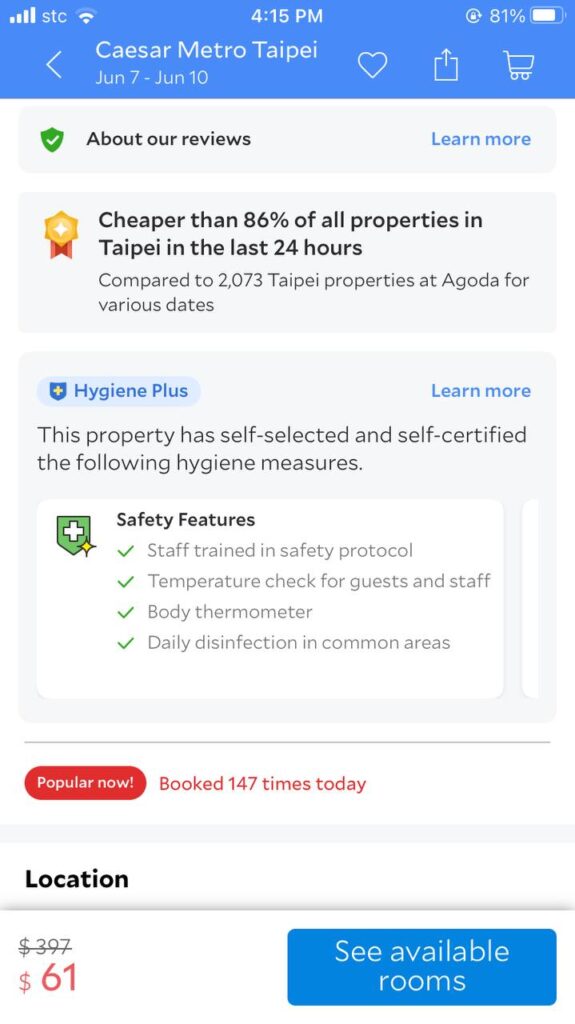
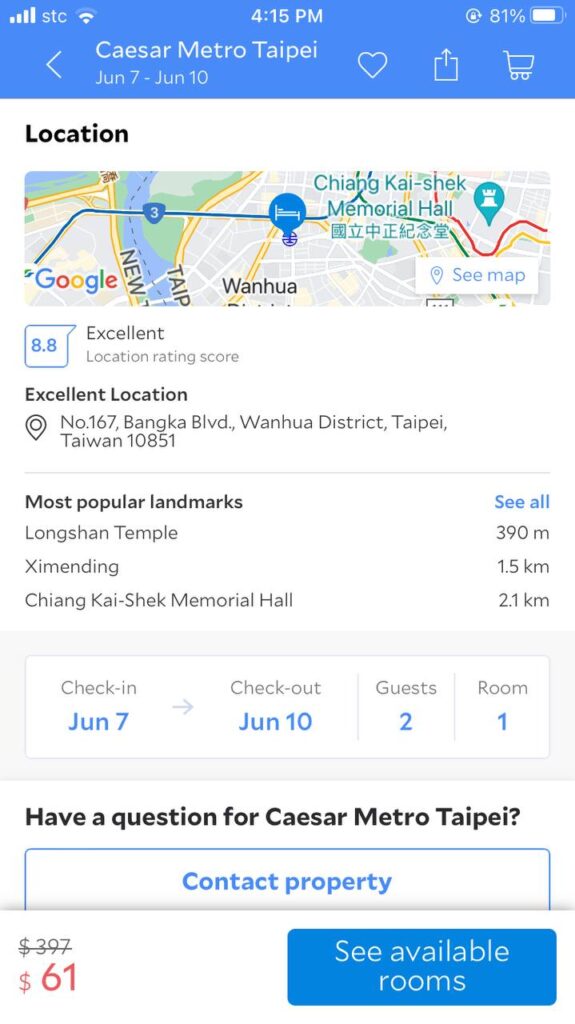
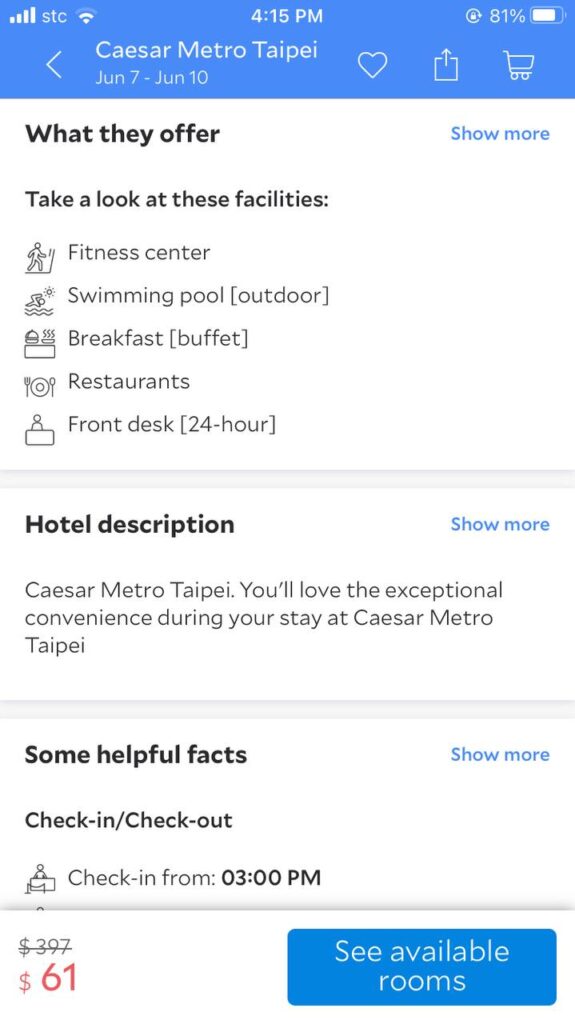
Agoda
Agoda is an online travel booking platform that helps you in all aspects of traveling- trip recommendations, flights or accommodations.
For most travelers, Agoda earns its reputation as a hotel booking app. The company has partnered with over 2 million properties in about 200 countries worldwide; one of the most property reach in the world. Not only that, Agoda pioneers in non-hotel accommodation like homes and villas.
The app offers huge discounts of up to 70% and also does flash deals. So, when you open up at the right time, you could snag some golden eggs. The app guarantees the best price in the market.
Agoda stores your booking reservation for your upcoming trip, giving you ease of access if there’s a need. It also shows the status of your booking or any need of action on your side. You can also view your completed bookings or the ones you cancelled, giving you a chance to review these bookings.
They also offer cashback, a loyalty rewards program that helps you save on your booking.
Quick How To Use Agoda App
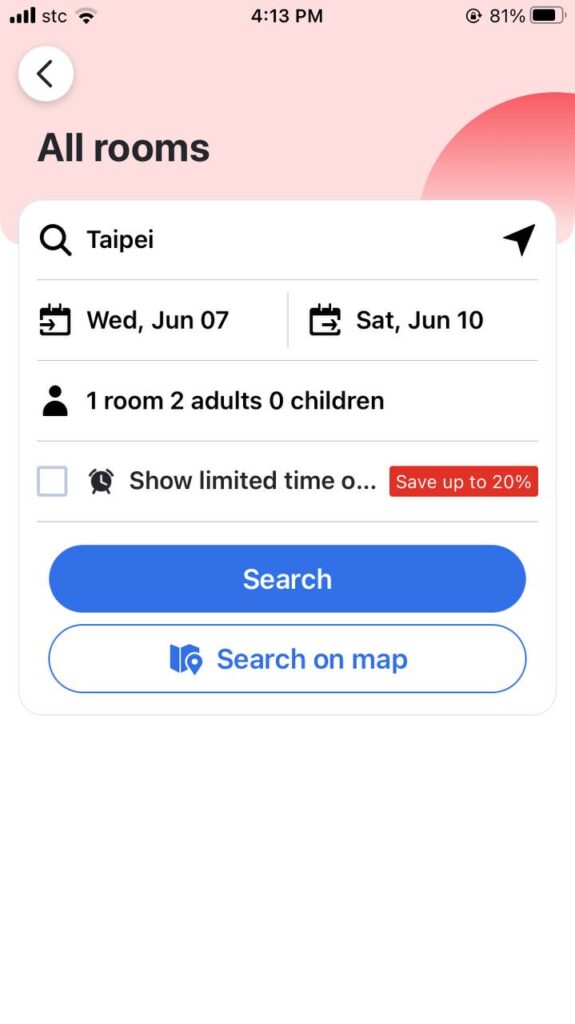
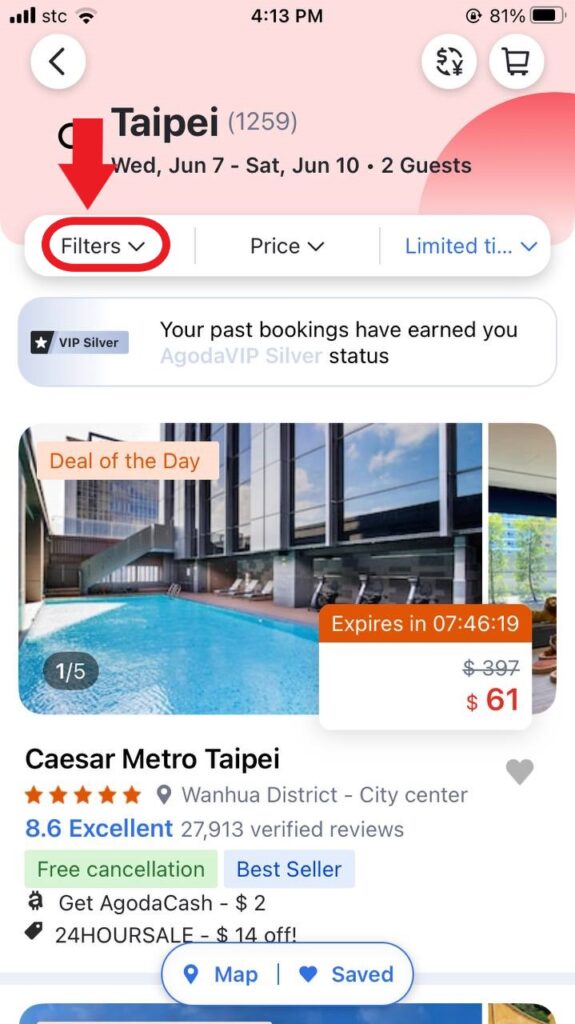

You can download the Agoda App here for iOs or Android.
TripIt
One alternative to printed itineraries is Trip It.
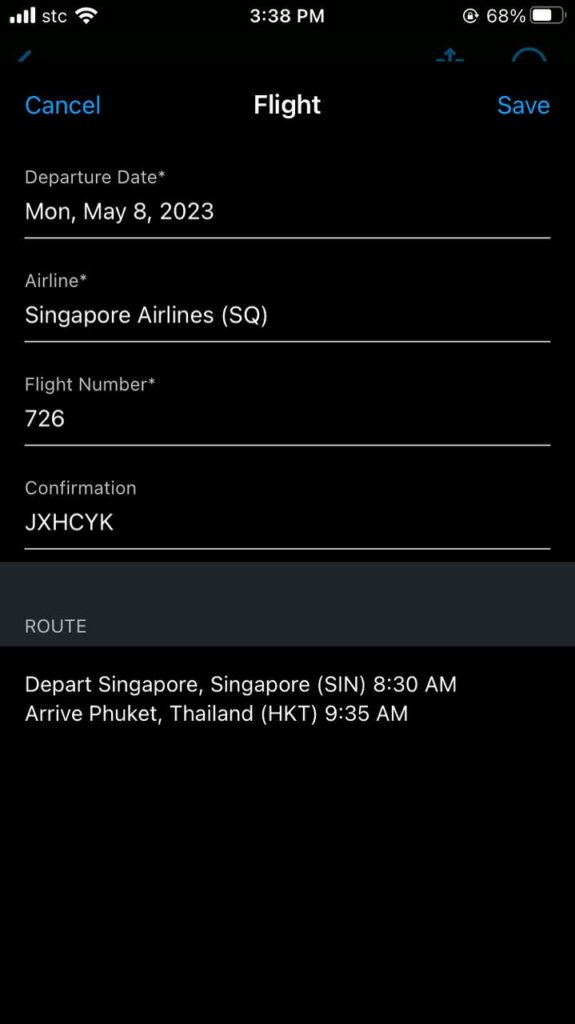
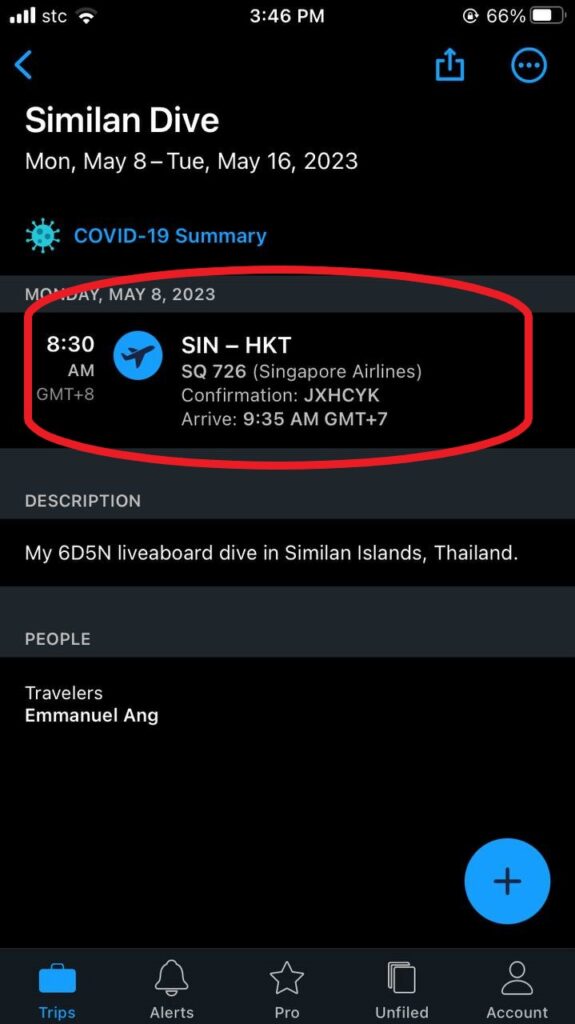
It’s a trip planning app that helps you organize your activities and schedule. Wherever you booked your flights and hotels, Trip It can integrate that on their app for peaceful trip tracking. They claim to have over 20 million users.
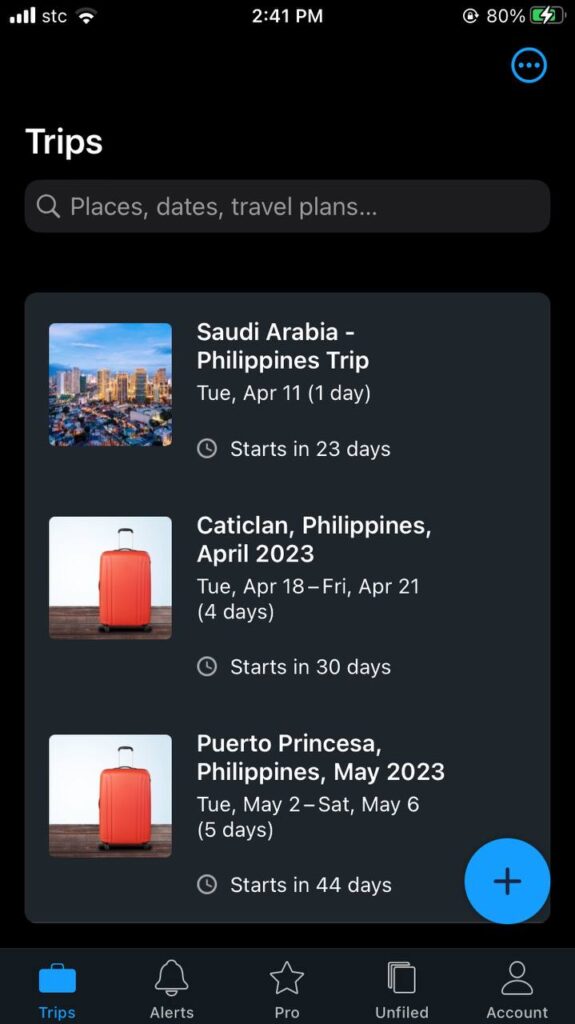
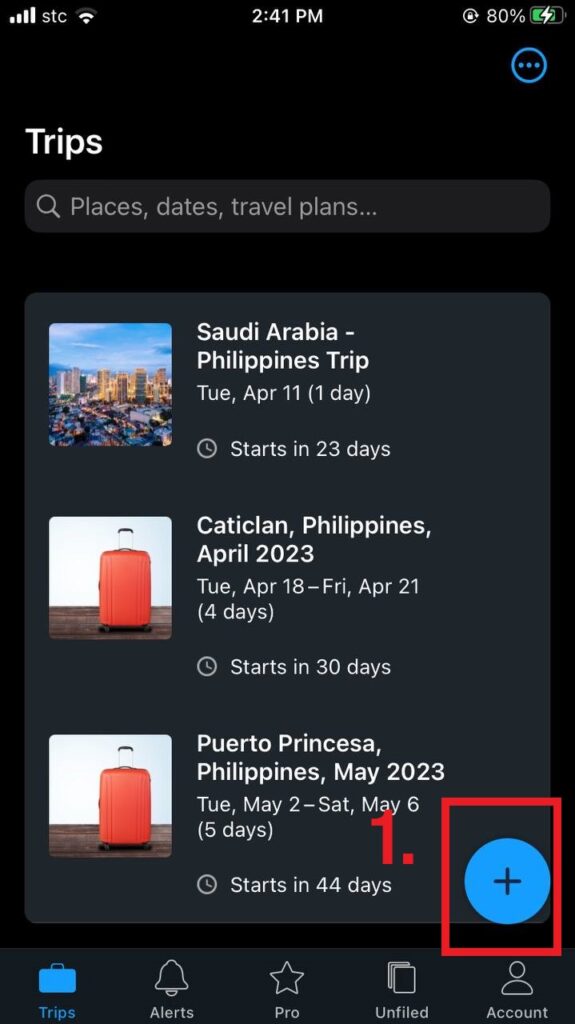
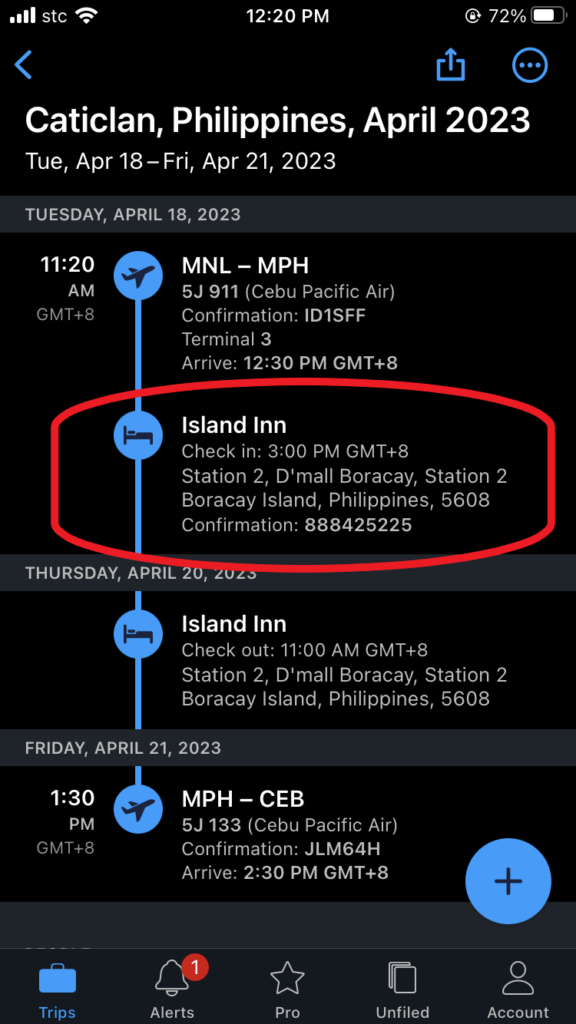
Trip It’s UI is pretty straightforward. As soon as you’re registered and logged in, the app will lead you straight to your trips. In this tab, it shows the basic info on your upcoming trip like destination, dates and when will your trip start.
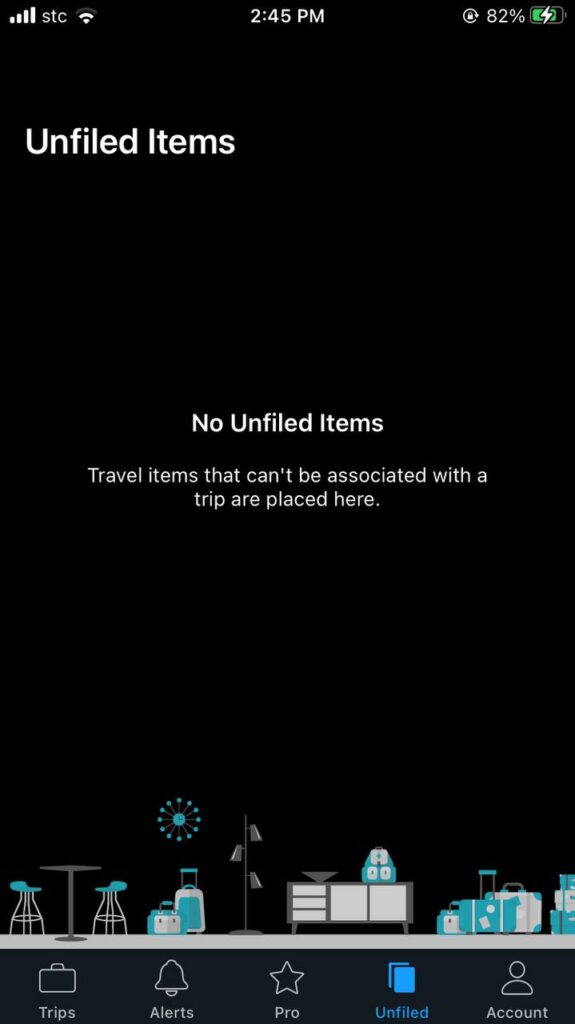
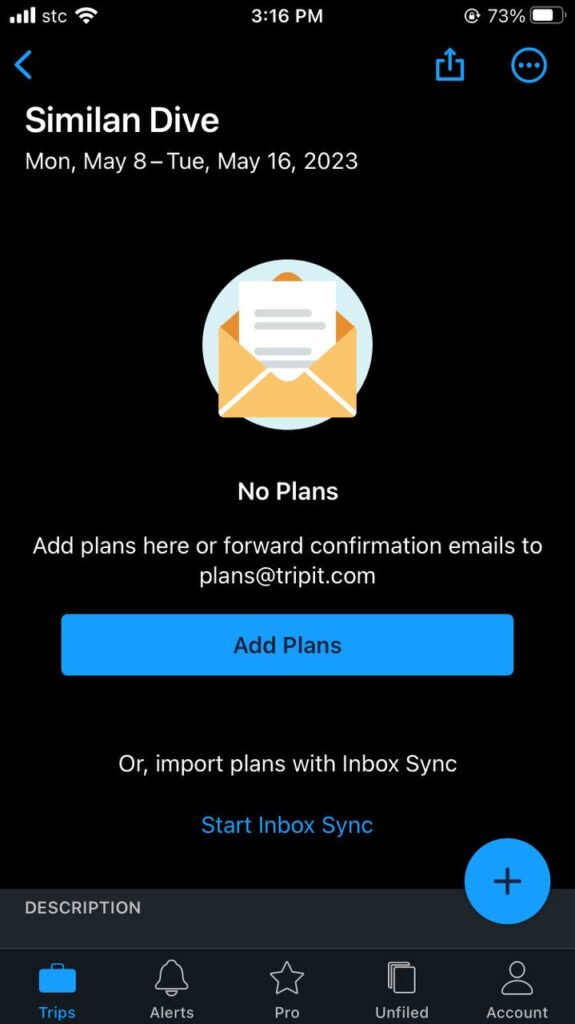
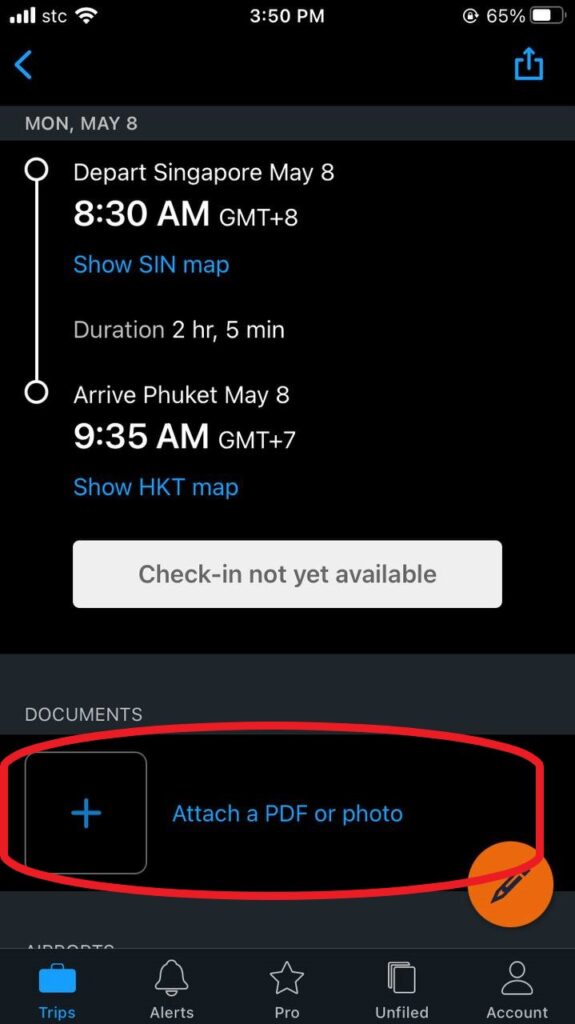
Trip It safely saves files for your upcoming trips (flights, hotel bookings, etc). When Trip It can’t connect the file to your upcoming trip, it moves it to the Unfiled section of the app. In that way, you can manually associate these files on your upcoming trip. They keep these files until you come back for it.
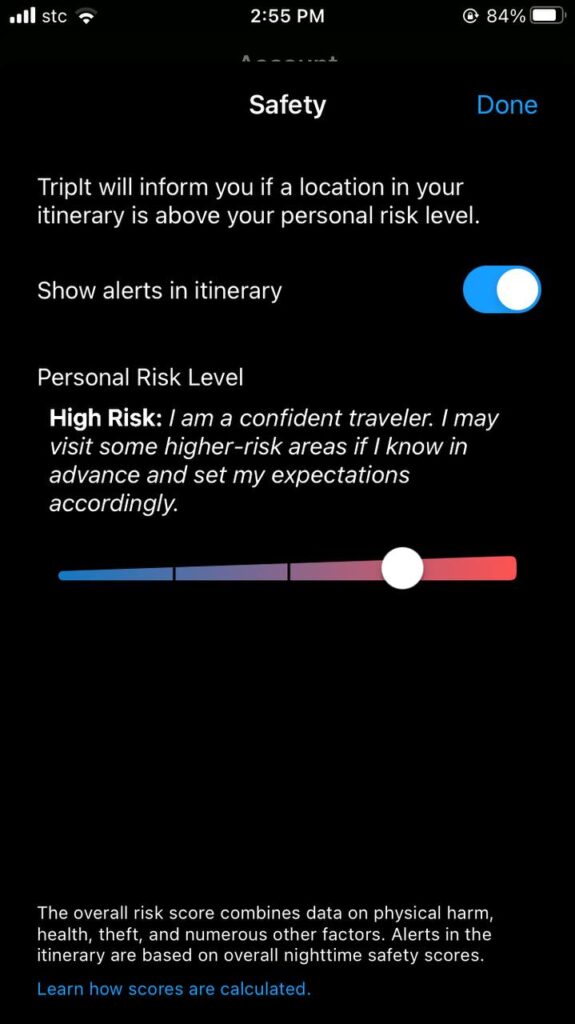
One unique feature is the safety option in which Trip It will notify you if the location you’re in is beyond your personal risk level. You can adjust this based on your preferred risk level. Trip It has a way to score a location’s risk level based on safety indexes, reports of crime and theft, etc.
TripIt Quick How-to-Use
How to make an itinerary
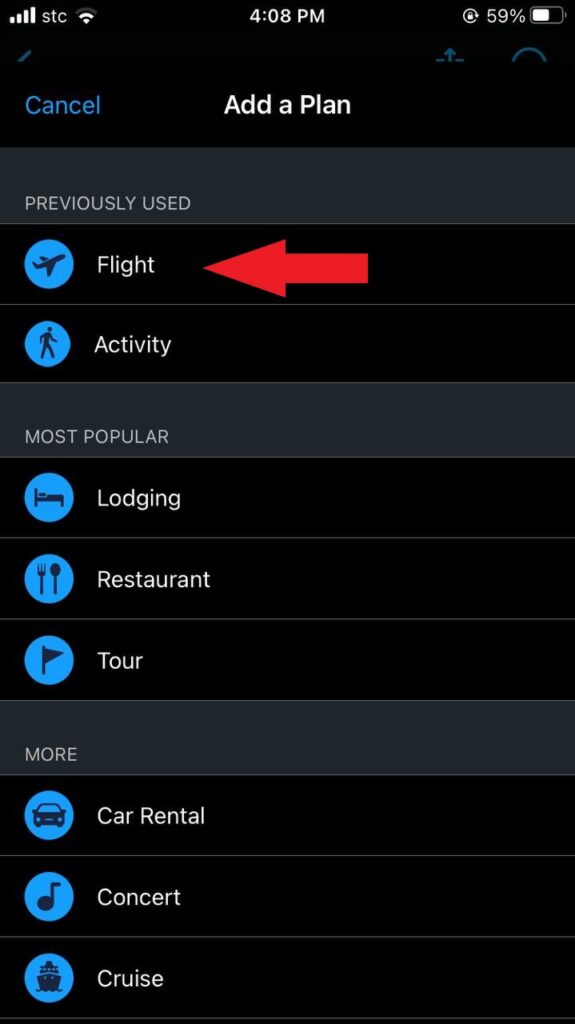
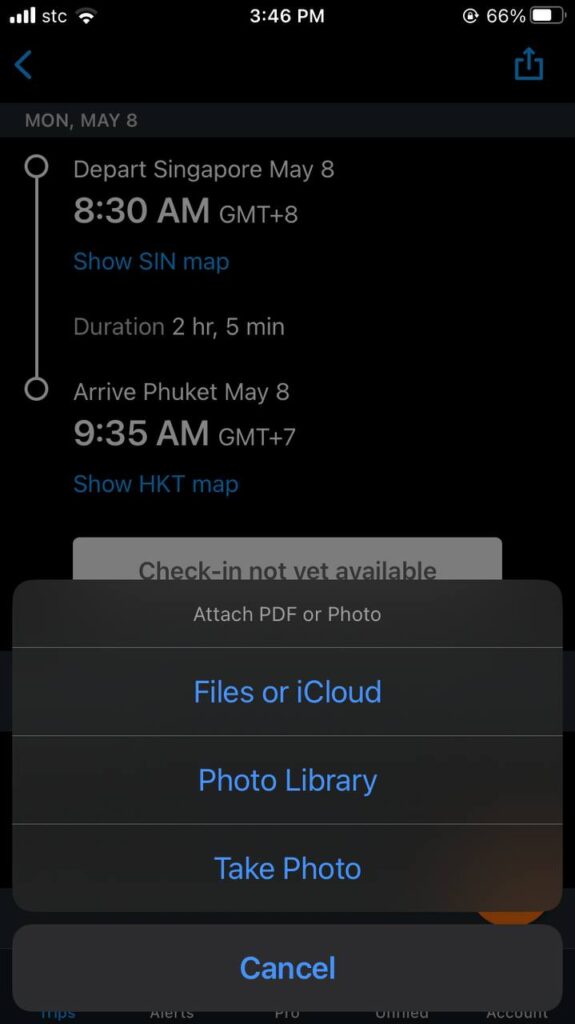

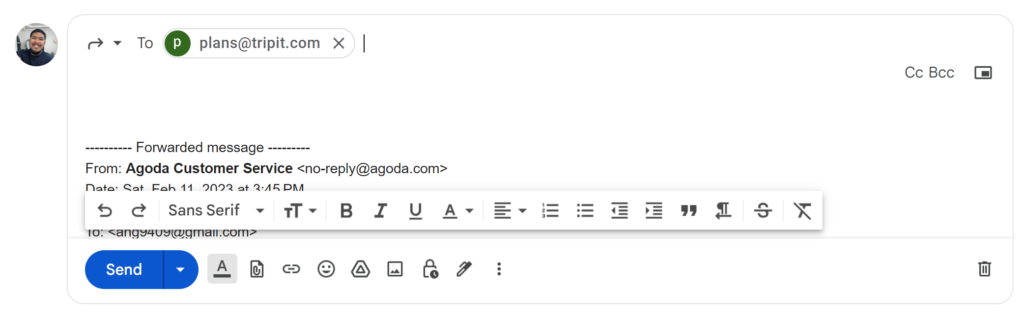
How to send a booking confirmation on the app

You can download the TripIt App here for iOs or Android.
Google Translate
I really can’t imagine going on a trip without this app. This changes the travel game exponentially.
Developed by tech giant, Google, Translate is a translation service to translate text, speech or website from one language to the other. A human translator can translate one (or two, at best) language, while this app can do over 100 languages.
A whooping 500 million users use the app daily.
Yep, every single day.
Google Translate is great for when you’re travelling and need to talk with people who don’t speak your language. English language may be universal, but there are still people out there, in the corners of our world, who don’t speak it, even for a bit.
Also, posters and signages rarely have a ready translation for them. The app also eases the difficulty of figuring out what the other person is trying to say.
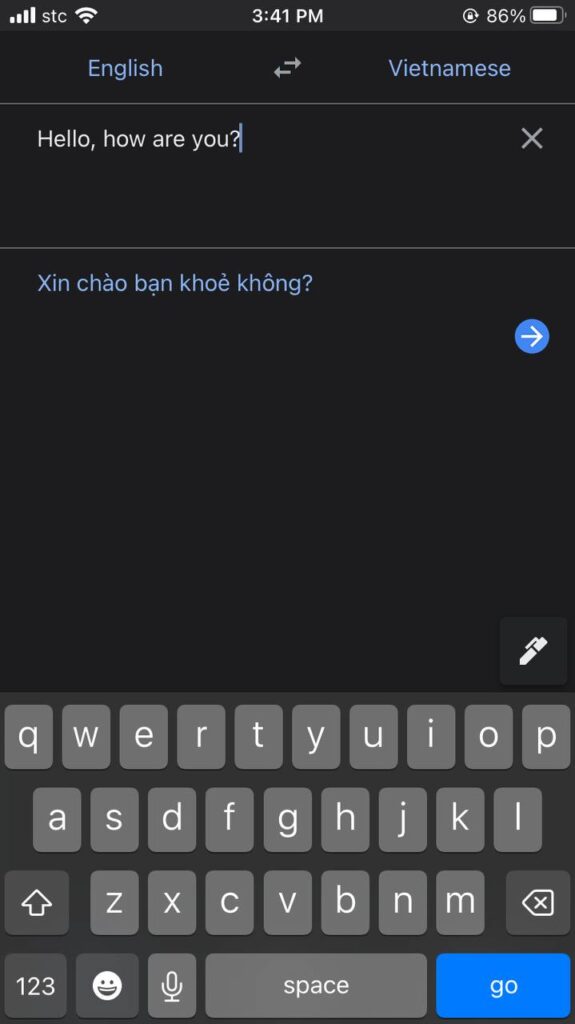
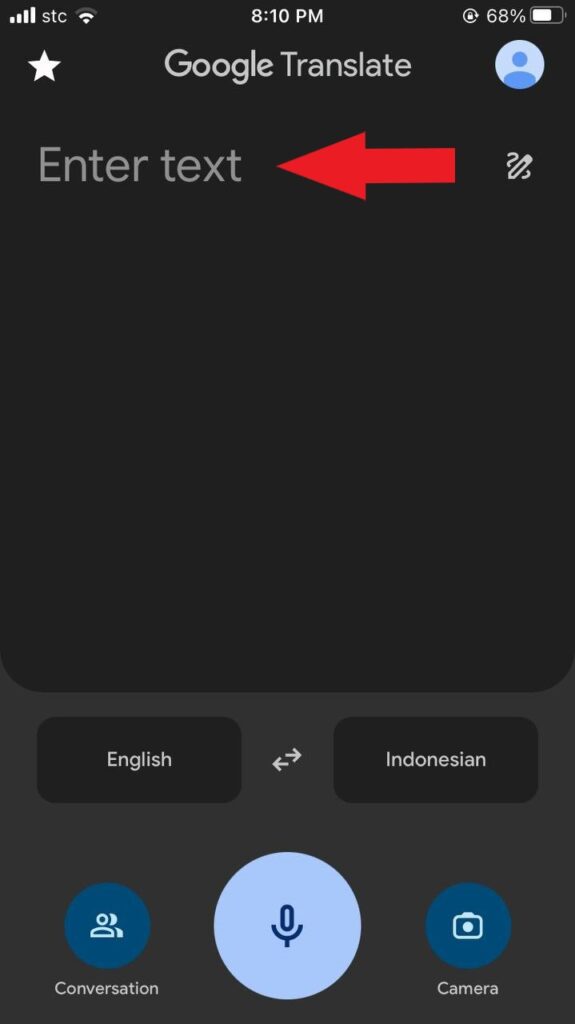
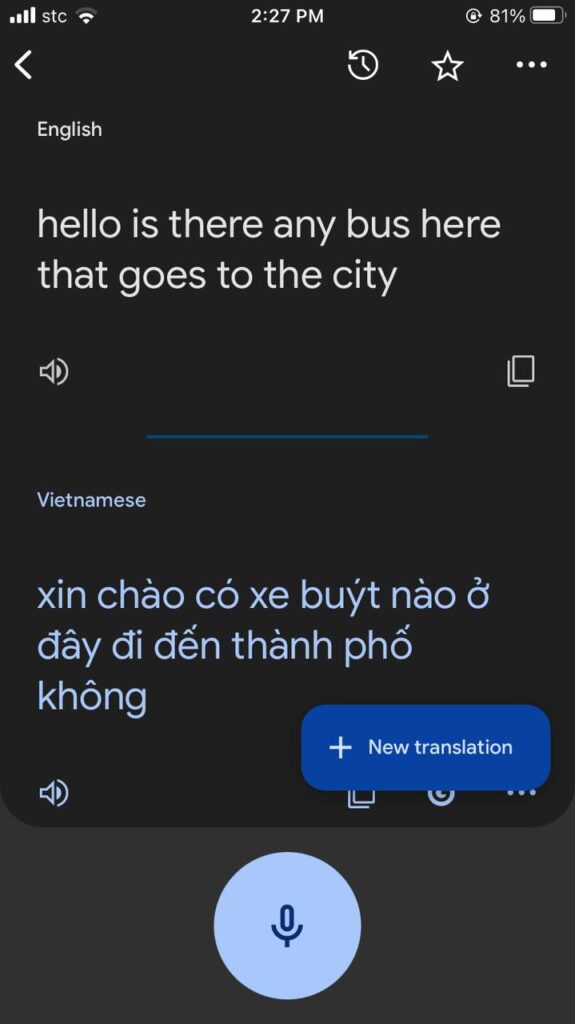
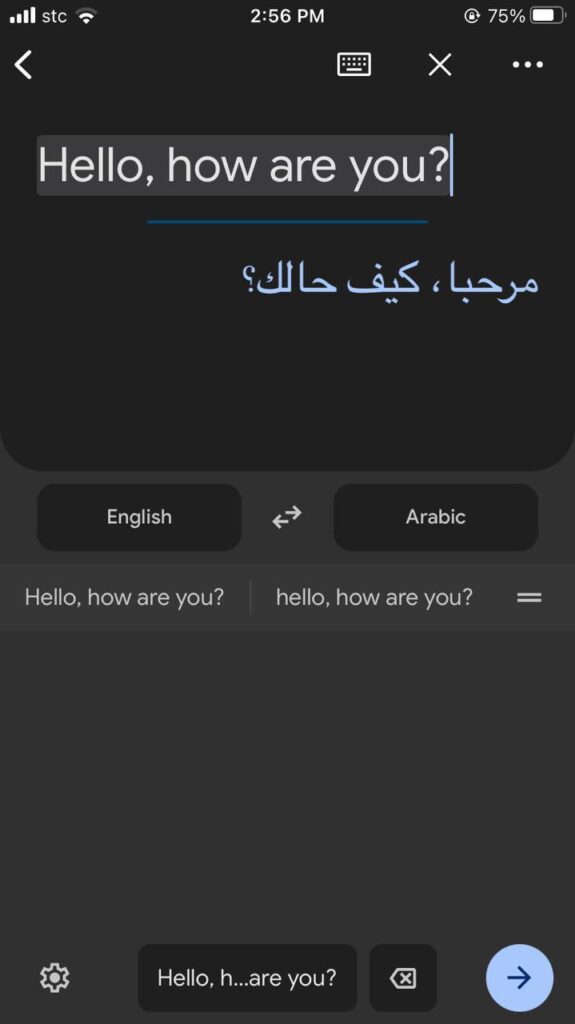
As you open the app, it shows an area where you can enter a text for the app to translate. Above the text area, you’ll see the two languages you’re translating from and how you want it translated. On the left is your language to translate, and on the right is the translation you want. Here, I wish for the translation of the language English to Vietnamese.
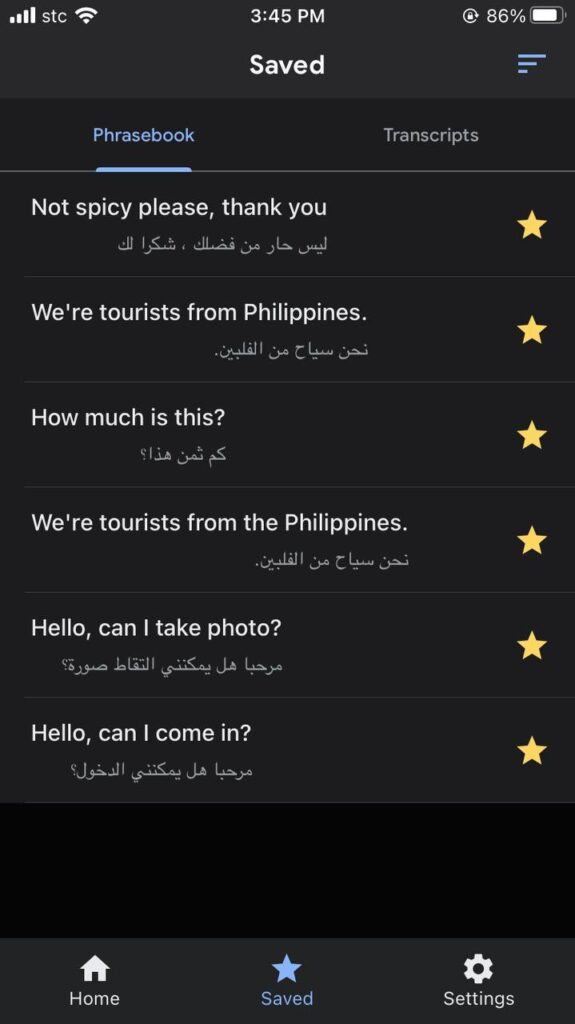
At the Saved tab, you can save several common phrases that you think you’ll used often during your travels. By doing this, you can make communication a way lot easier just by showing them the saved translation quickly.
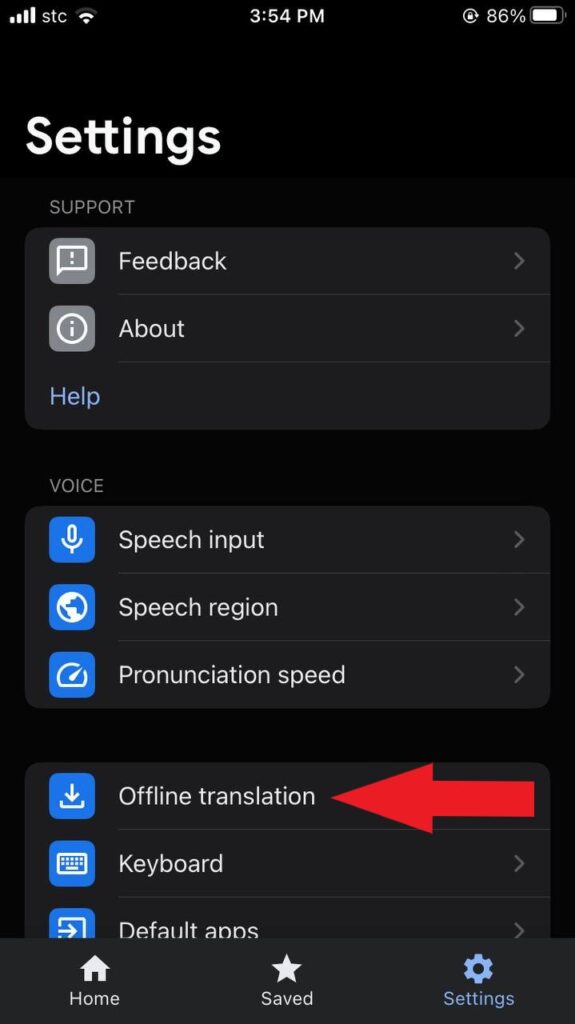
One interesting setting you want to know is the Offline translation. As the name suggests, you can use the app and translate even without the internet, but, it’s limited to text translation only. Figure out what language the locals are speaking and save it for offline use so you can use the app on the go.
Google Translate Quick How-to-Use
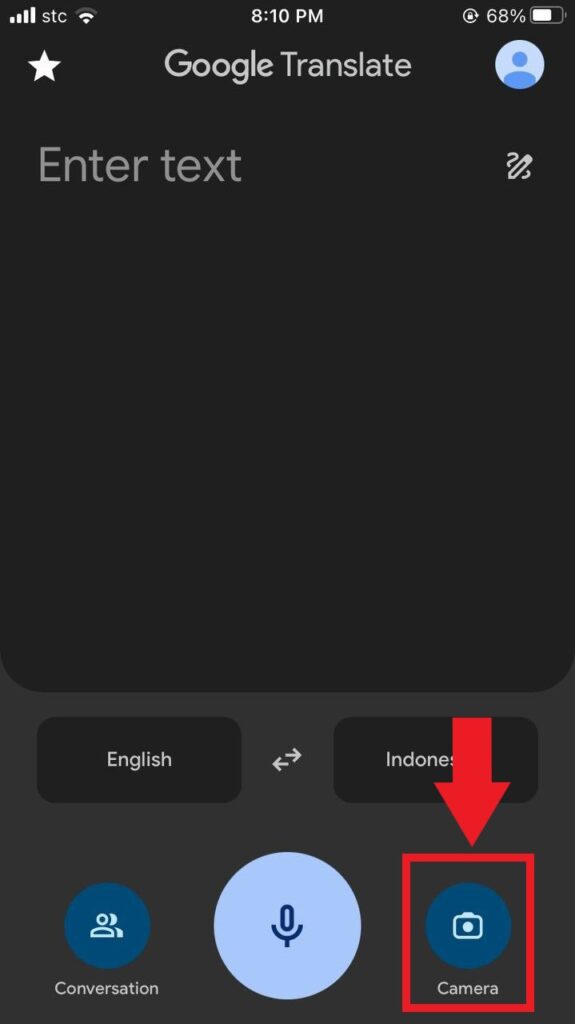
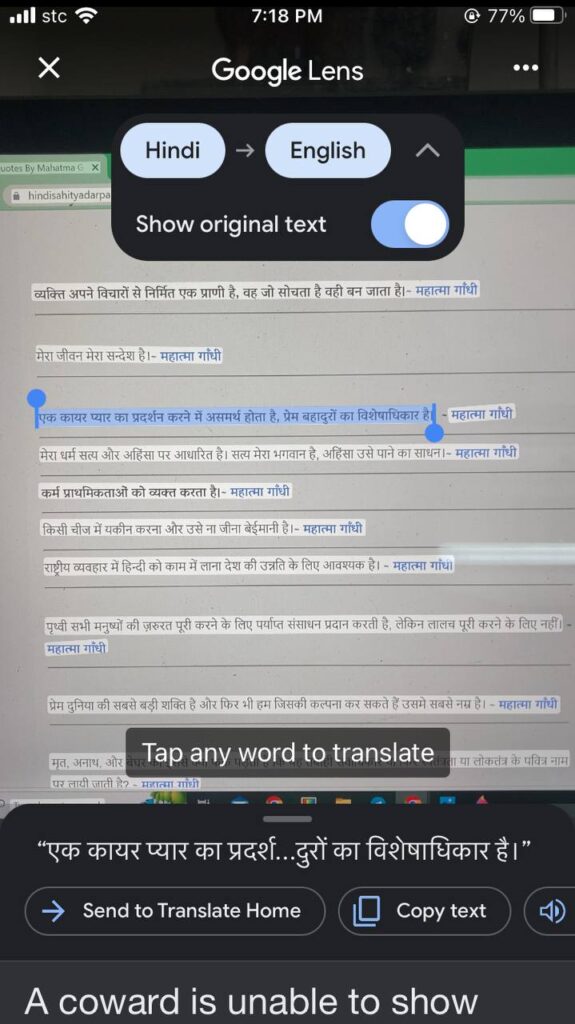
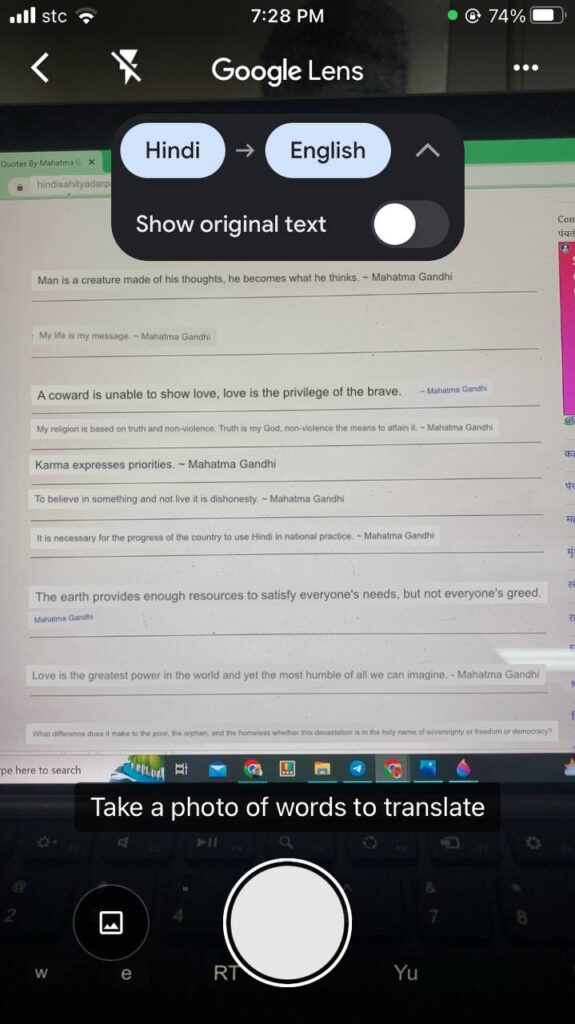
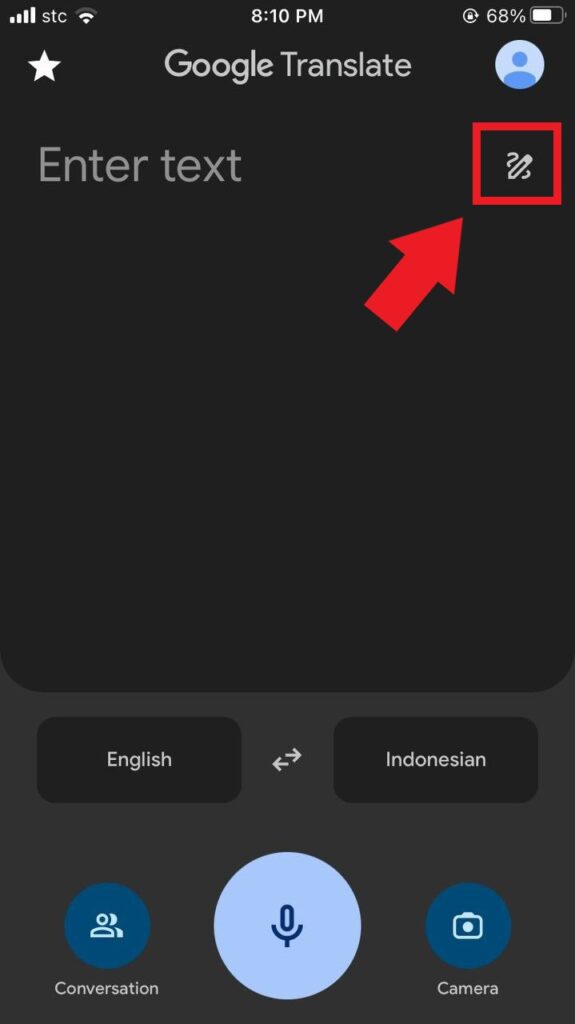
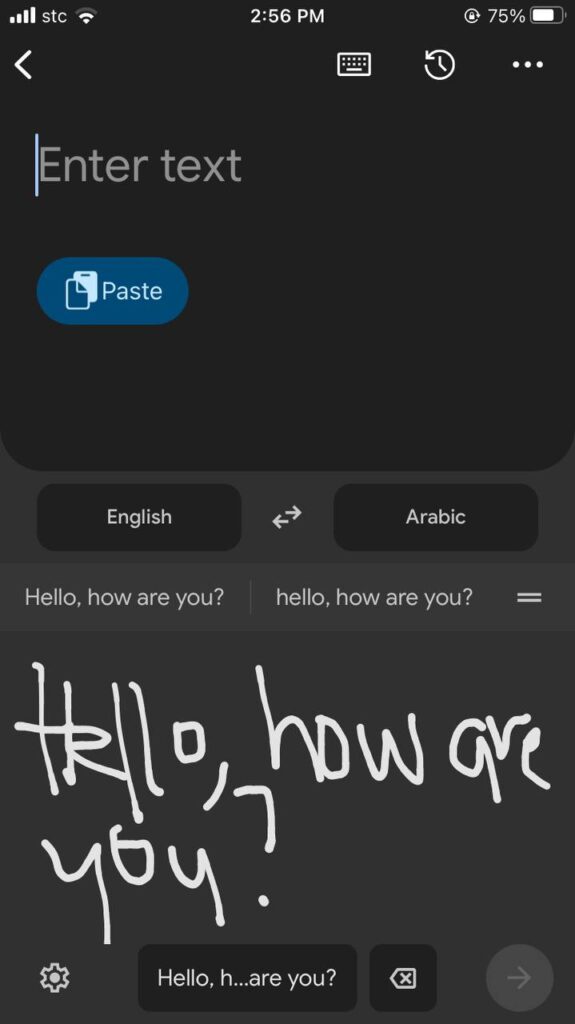
Google Translate has 3 ways it can translate: camera, text, voice or writing.
By Camera
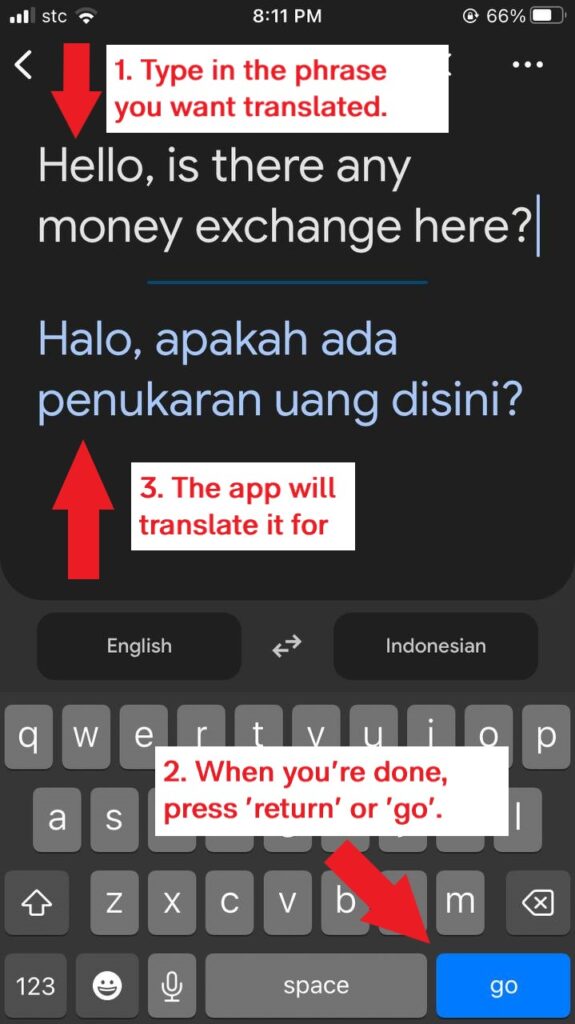
By Text
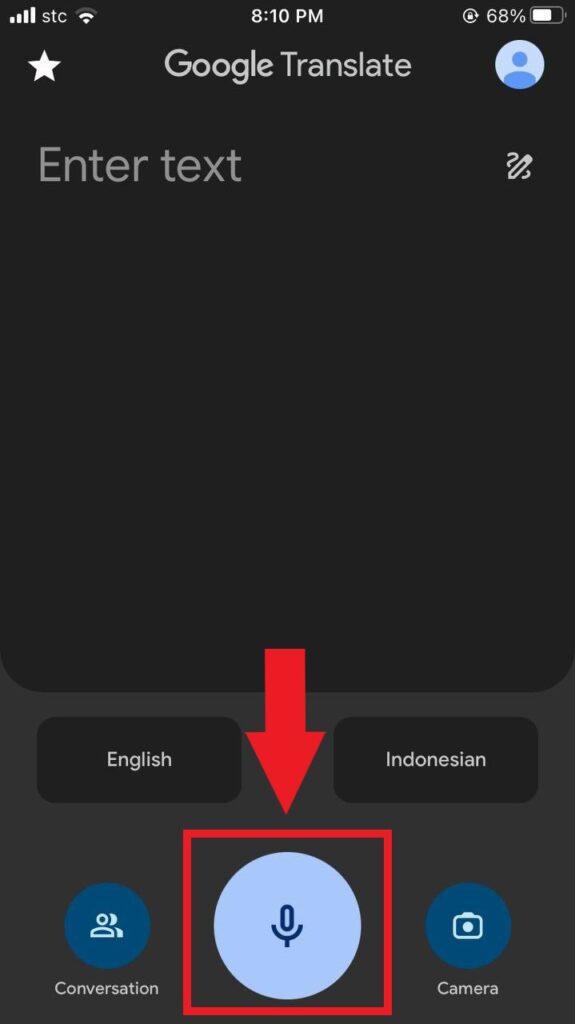
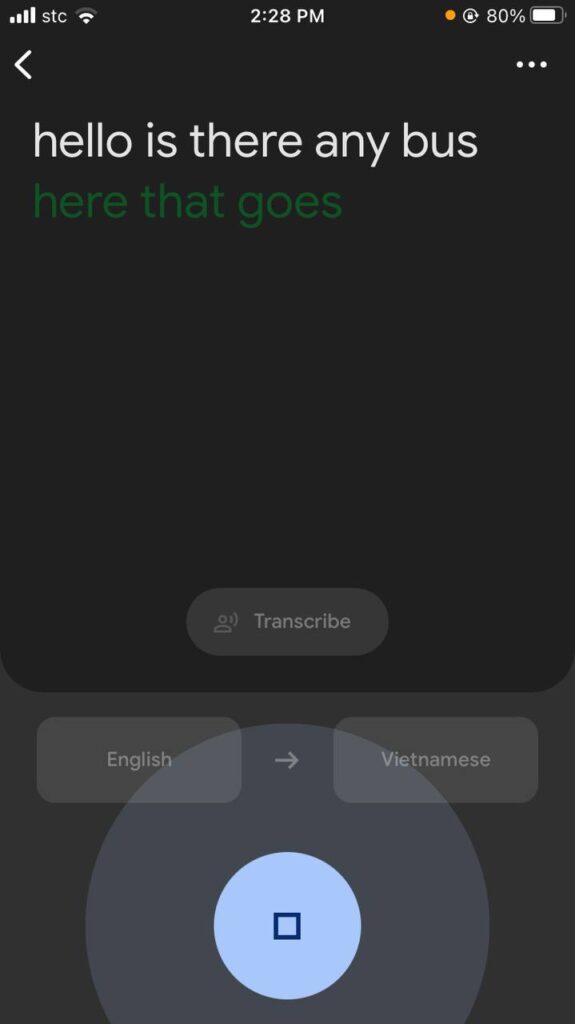
By Speech
By Writing
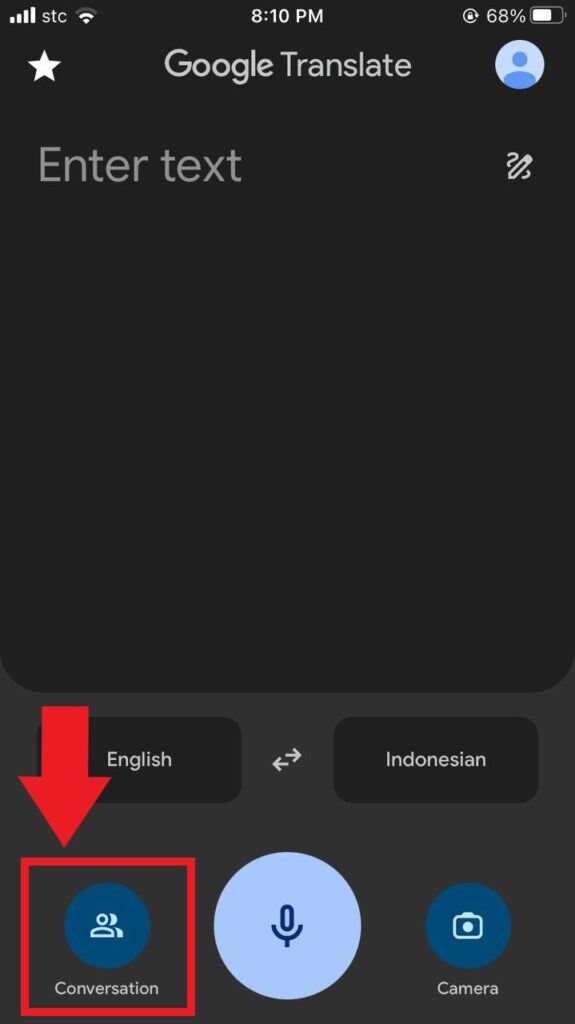
Conversation
Need to converse a bit more? By Conversation, you can exchange talks with a local and have it translate over the app. Best to show this feature by example. If you’re an English speaker and want it to translate to Bahasa (Indonesian), tap on the mic icon below your language and the app picks it up and translates it. Do vice versa for the speaker who wishes to reply to you.
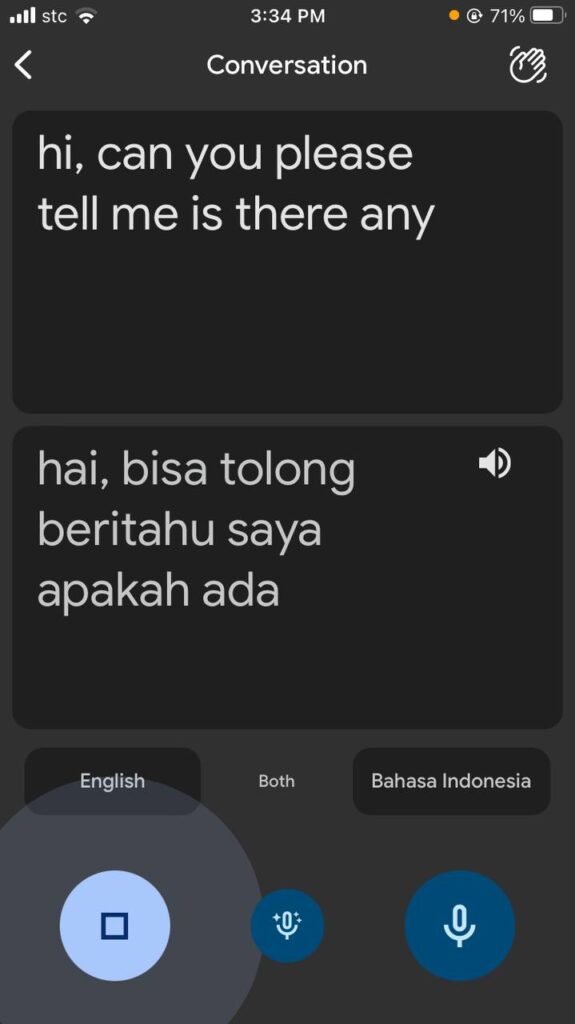
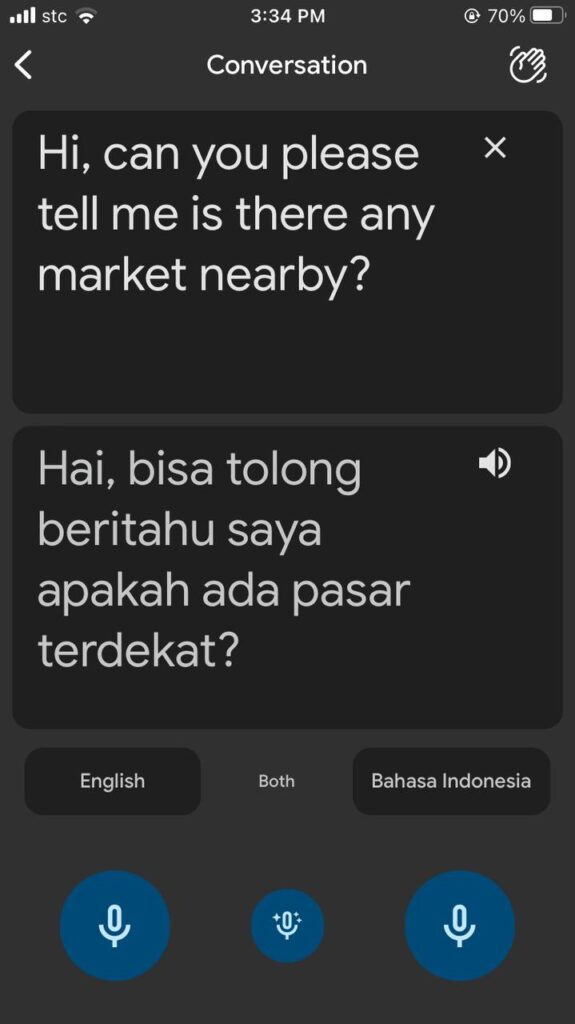
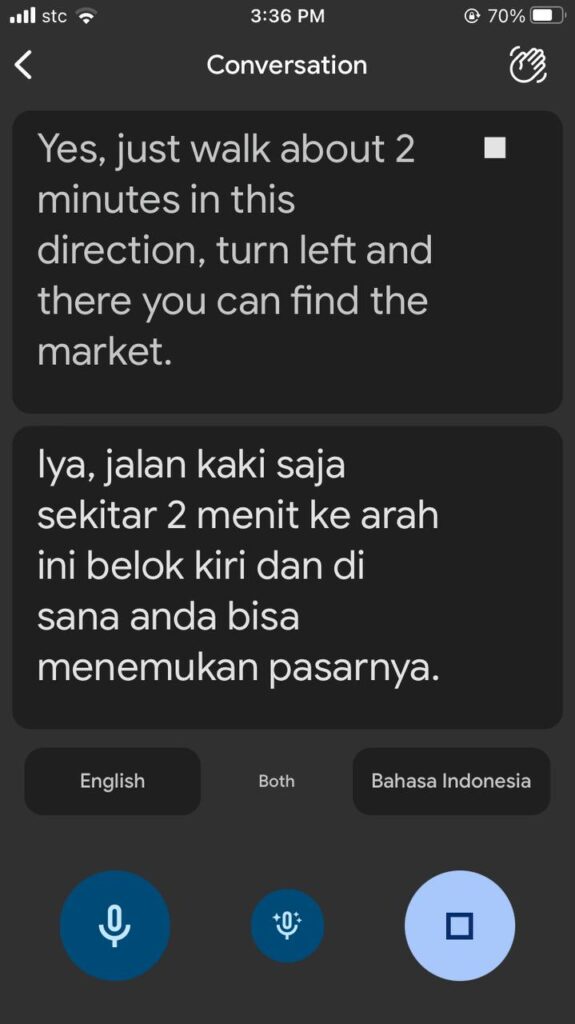
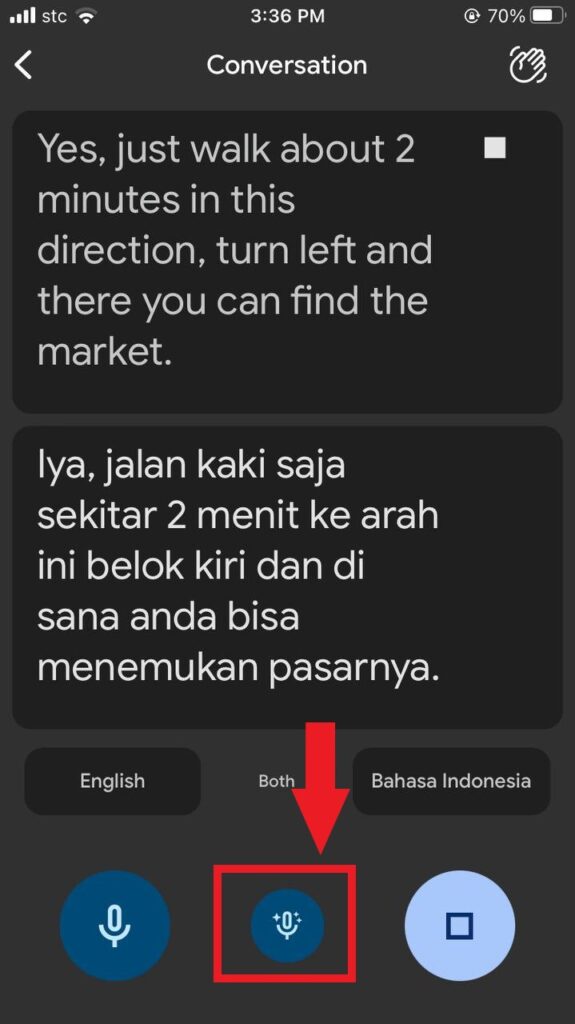
For smoother conversation, have the app translate both languages at the same time by pressing the “Both” button found at the middle of the screen.
You can download the Google Translate App here for iOs or Android.
Windy
Get one step ahead of your travels by checking the weather. This is where Windy kicks in.
Founded by kiter and pilot Ivo Lukačovič, Windy started in 2014 and by far the most reliable weather forecasting app out there. It gained a wonderful reputation from surfers, paragliders, sailors and other outdoor junkies, and so should you.
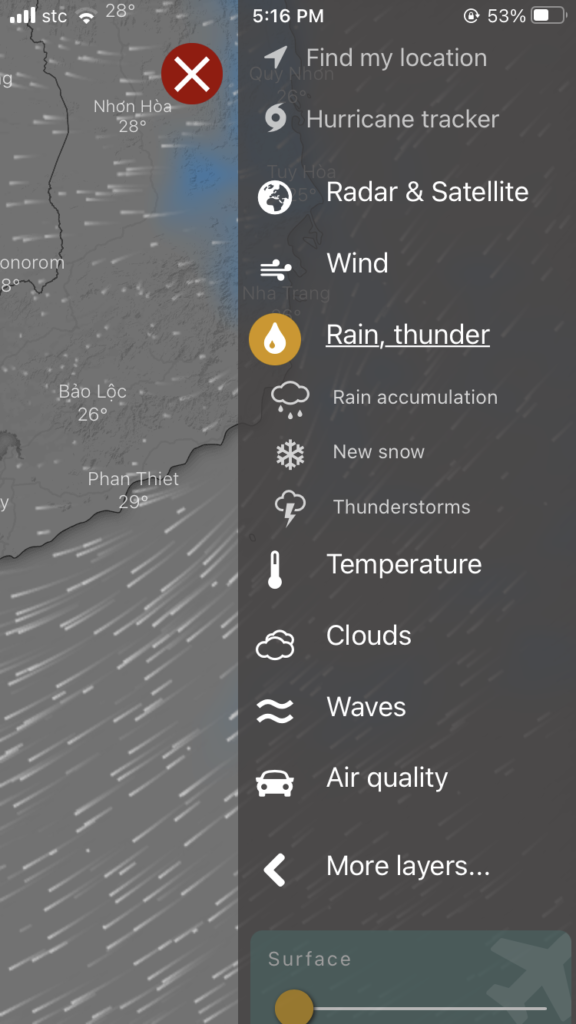
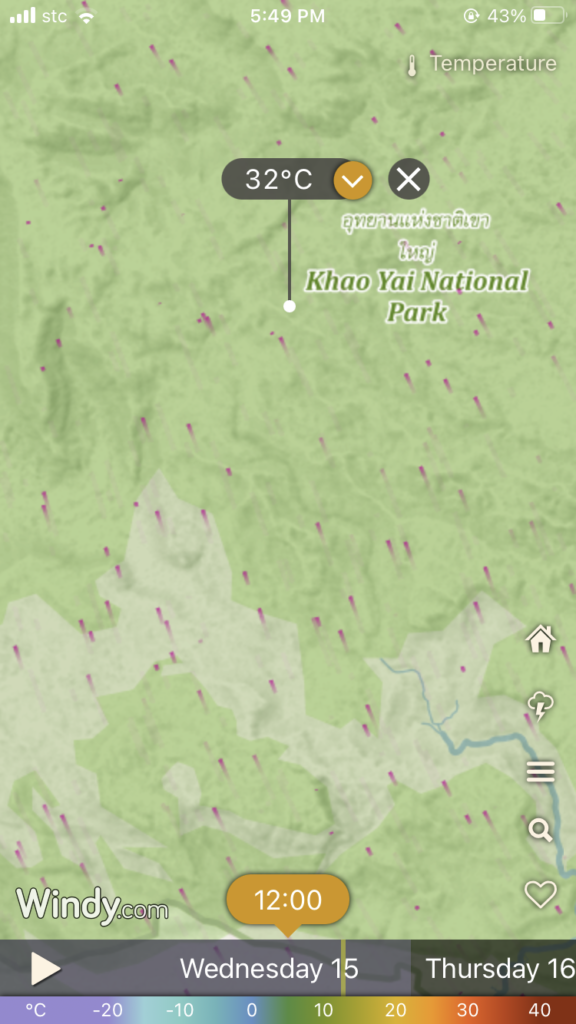
With its interactive interface, Windy provides all weather data that you can think of – rain, wind, gust, humidity, typhoon, temperature. Virtually all information that you need to know about our atmospheric phenomenon, this app has it.
You can check the weather forecast and change plans when weather’s not on your side. It pays to be attentive to the weather.
As a traveler, you’re going to be outside for your travelling and activities. This will help you prepare and make reroutes of your plans.
Windy answers your simple questions like, “is it going to rain later?” or “how hot will it be later at 3PM?”, If a yes or no can suffice you, Windy can do that.
It also answer the question “how long? Or how strong?”. Whether you’re satisfied with a simple answer or you want an in-depth weather info, this app can perform.
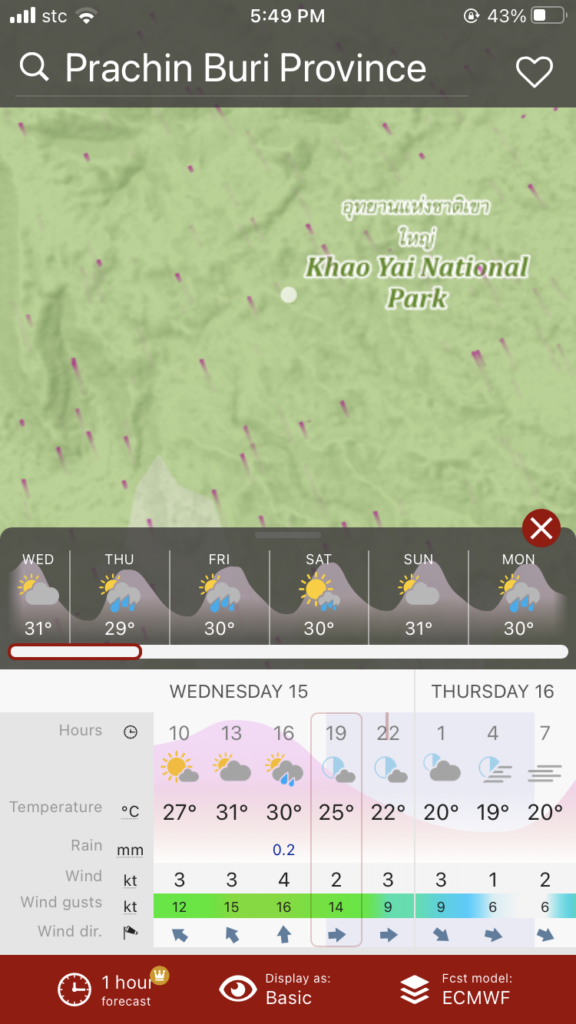
Although the app offers premium service, the free version is good enough knowing the weather ahead of time. It can look up at least 5 days of forecast on the free version.
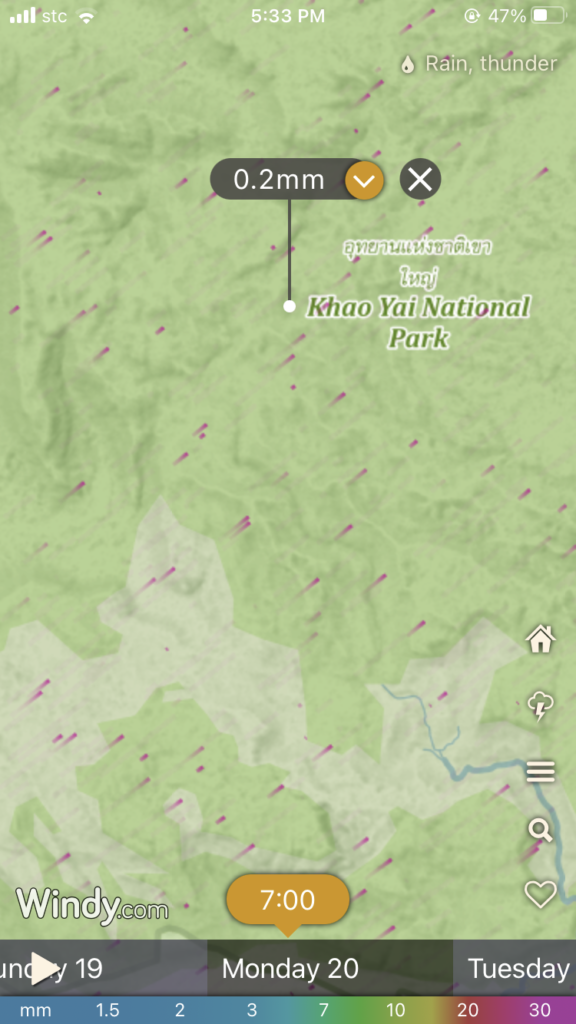
The app will immediately show the map on the screen as you open it.
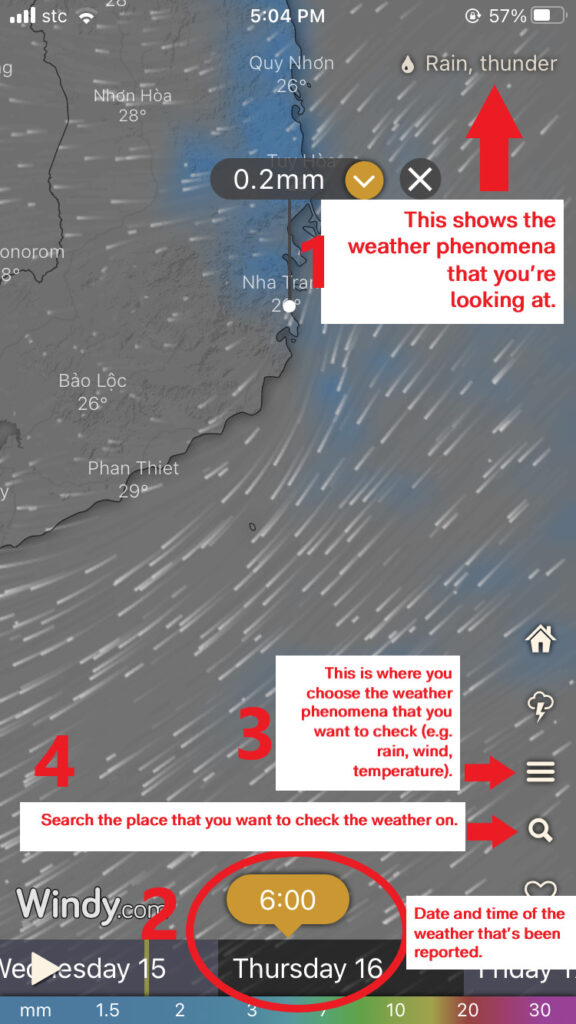
(1) The upper right corner shows which weather phenomena you’re looking at. Here, it’s the rain and thunder.
The pin shows how strong the rain would be, given the time and day that you’re looking at.
(2) At the bottom of the screen, you can swipe the time that you wish to check the weather on. In the example above, you’re checking the 6AM forecast on Thursday, March 16, 2023.
(3) At the bottom right, there are options you can choose from. One is the weather phenomenon. This gives you access to all weather phenomena the app offers. In our example, we choose to know the rain and thunder forecasts of Nha Trang, Vietnam.
(4) Next is the search. By clicking the search, you can type in the location that you want to weather check and the app will re-center the map to it.
Windy Quick How-to-Use
Say, for example, you’re going on a camping trip to Khao Yai National Park in Thailand on Monday, March 20, 2023. You want to check whether it will rain during that day. Remember, the free version offers a forecast of up to 5 days, so time your weather checking right.
You can download the Windy App here for iOs or Android.
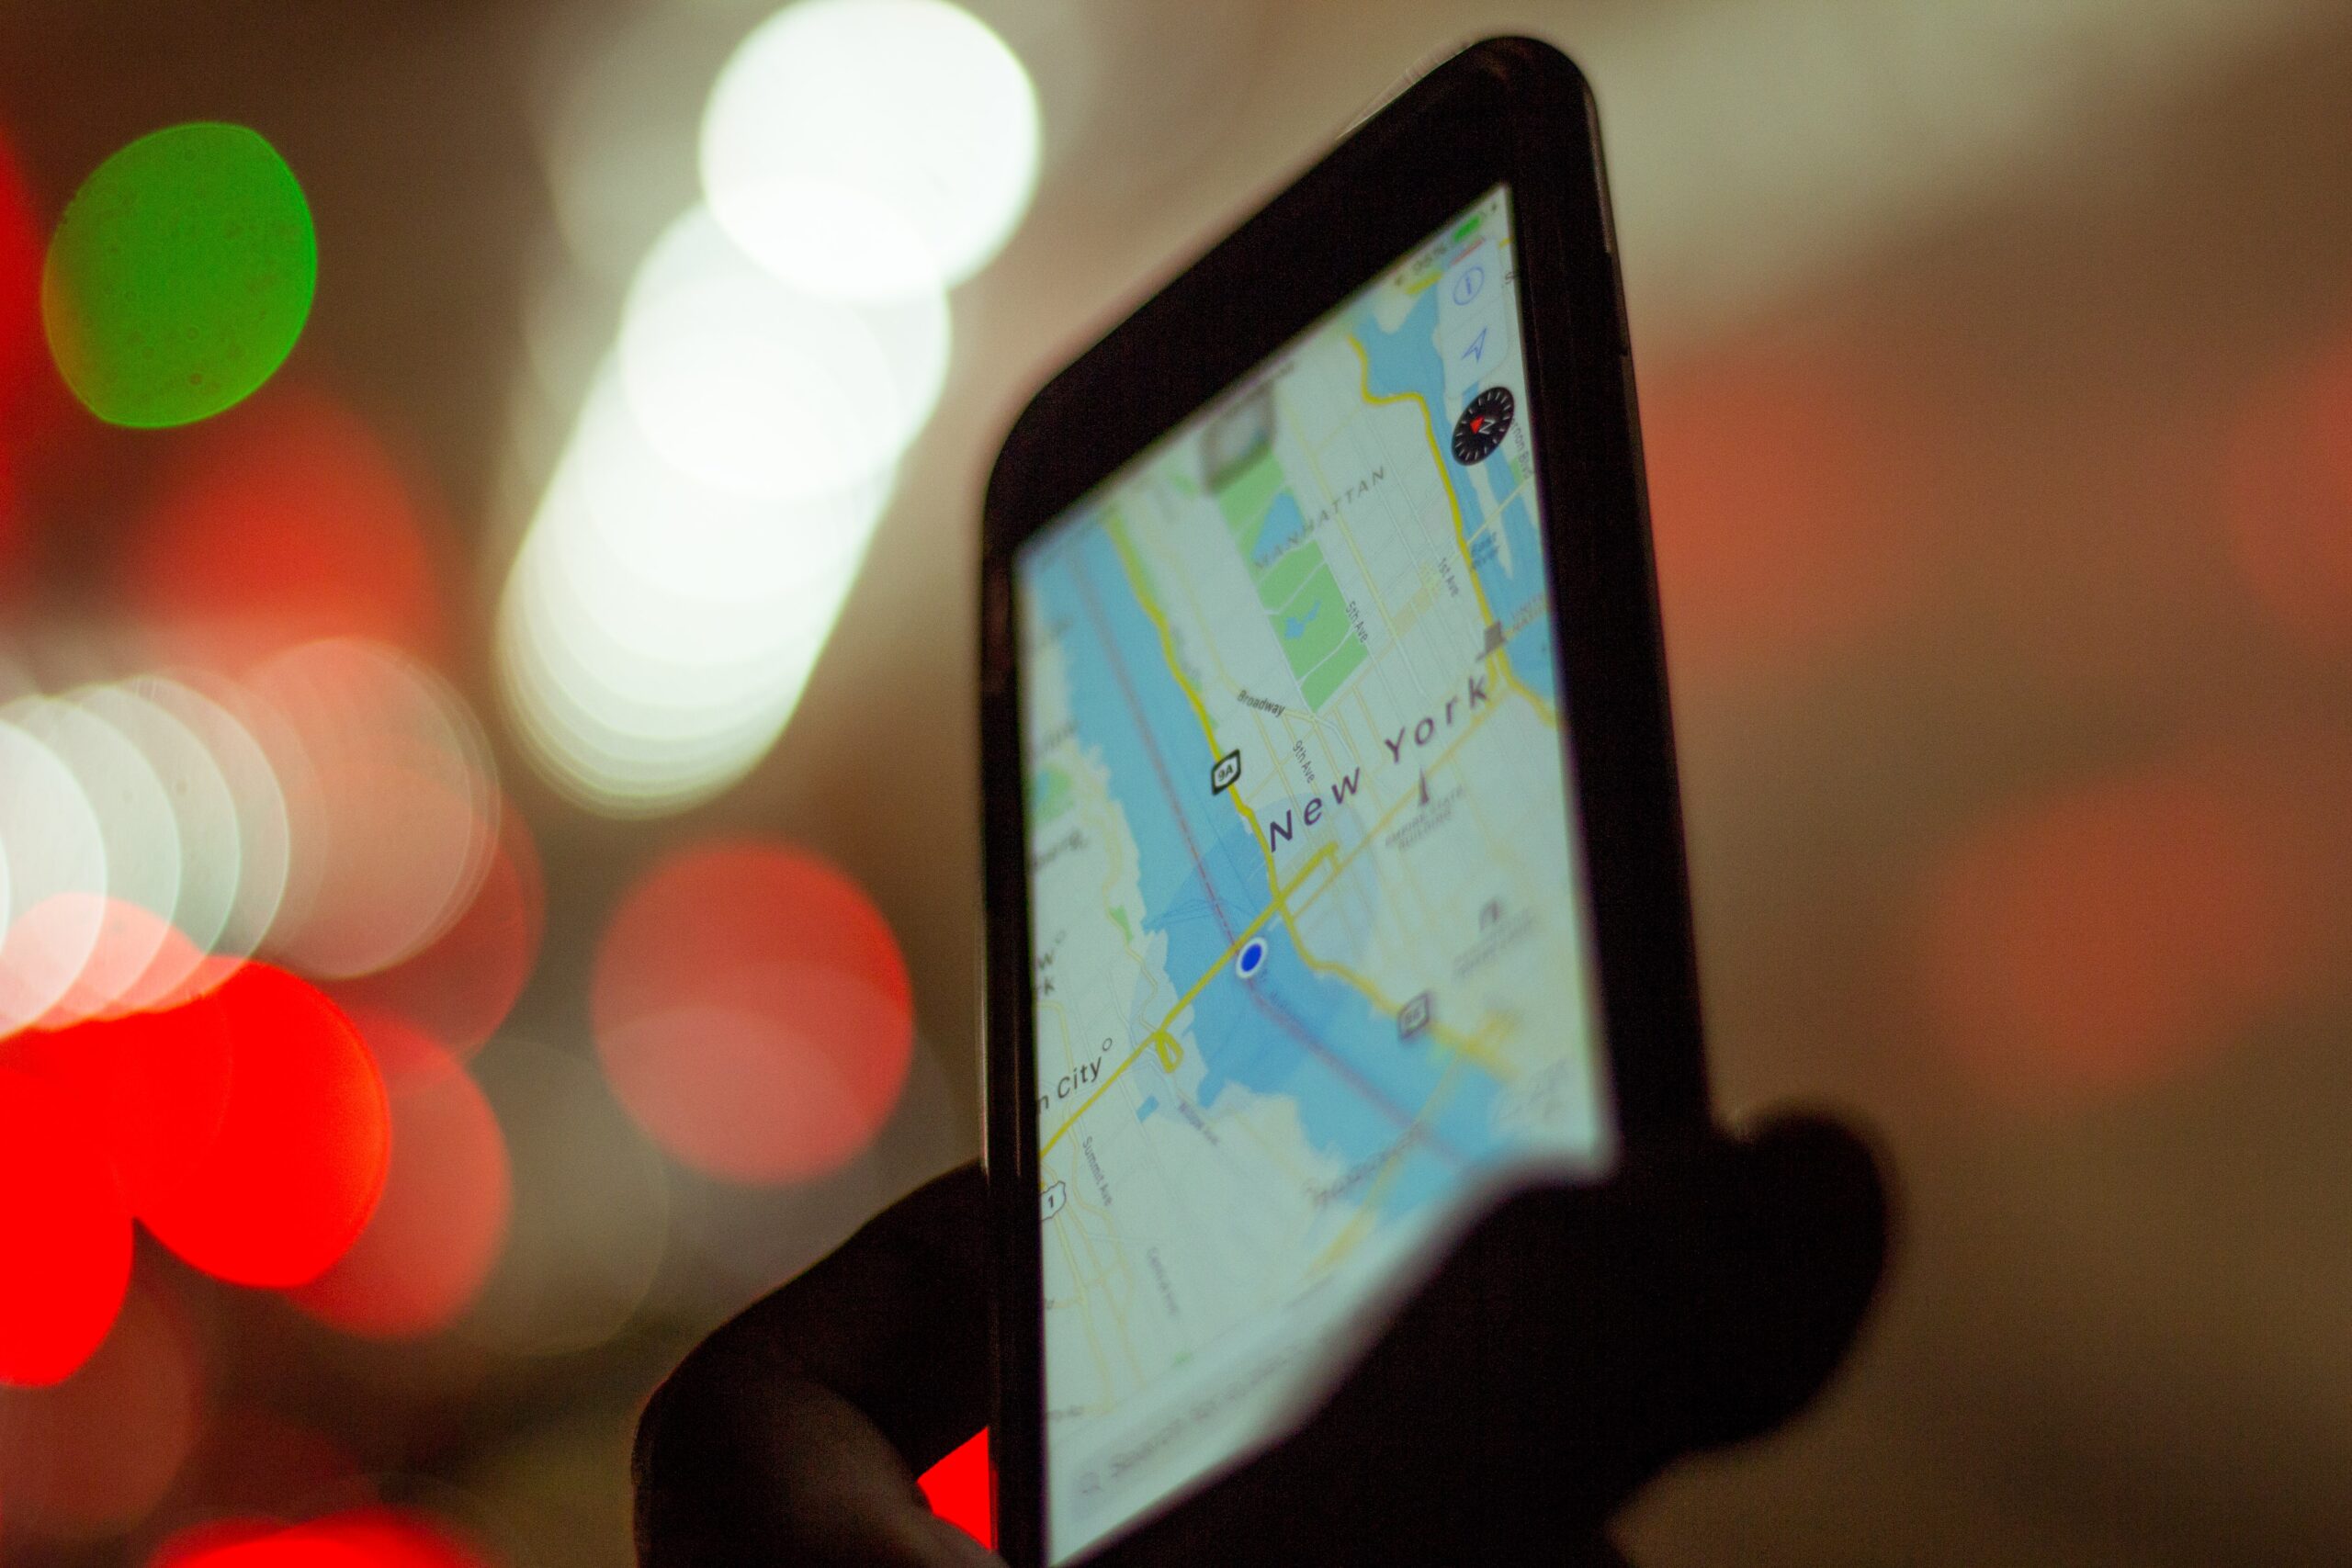
Google Maps
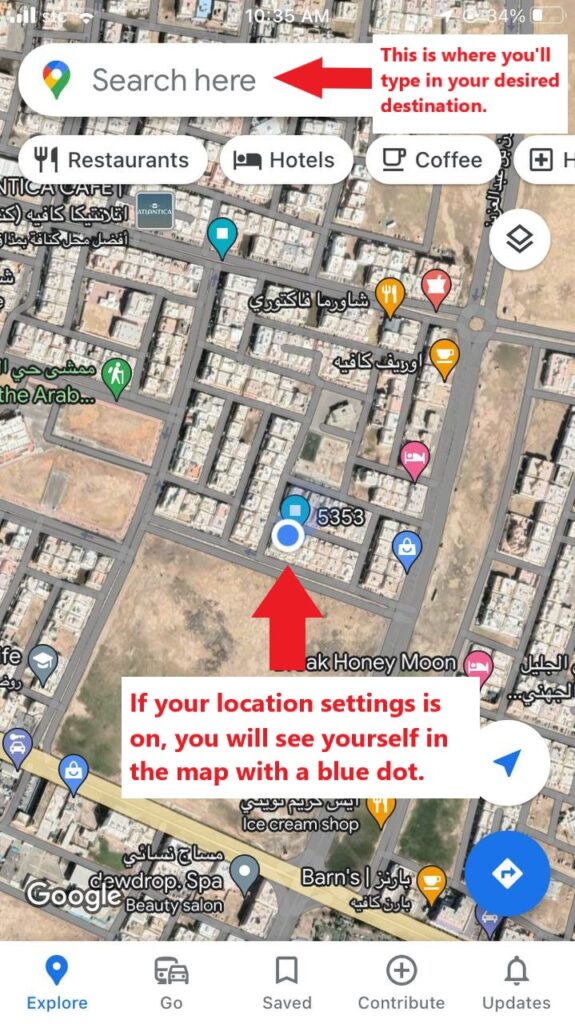
Google Maps is a web mapping application that helps you get from Point A to Point B. I call this the obvious app for travelers.
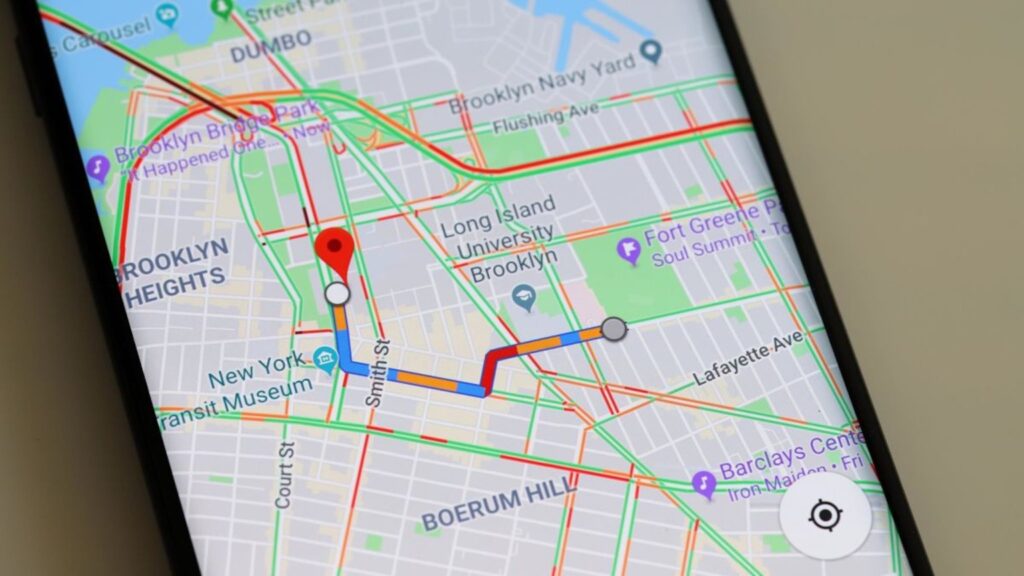
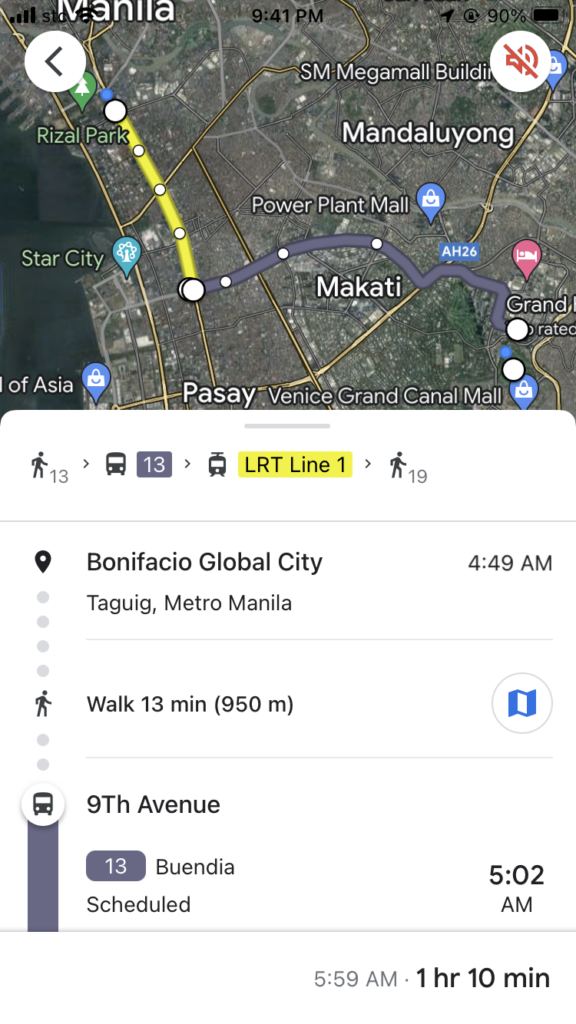
Again, thanks to the tech giant Google, this app has transformed from a simple map to one with tons of abilities. Users can see a satellite view of the map, a 360-degree view of the streets, know traffic conditions live and check faster routes whether you’re on a public commute, on a bike or in a private car.
Never get lost around the city looking for that famous restaurant, or going back to your hotel. The app’s interactive functions will help you find your way and stay on track. And in doubt, you can view the streets to make sure you’re in the right spot.
Since 2005, as Google progress, so was their maps. Of course, with their seemingly limitless wealth and resources, the tech giant has eyes on almost all the surface of planet Earth, either on land or from space. Plus, the data gathered by you and me have helped shape it.
Google Maps best serves when you’re in urban cities. But again, it’s getting more helpful even when having adventures in suburbs or even in the rural mountains.
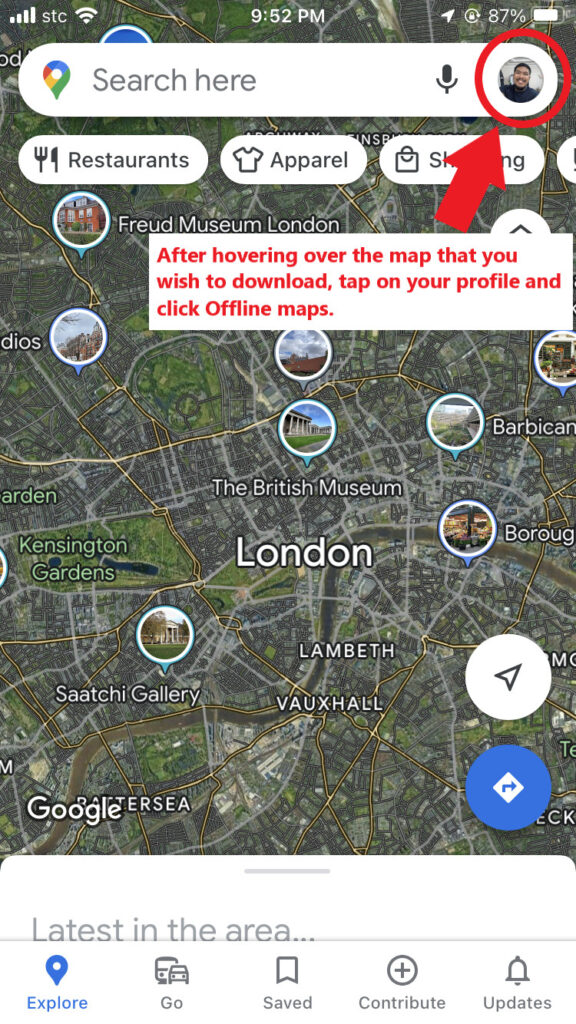
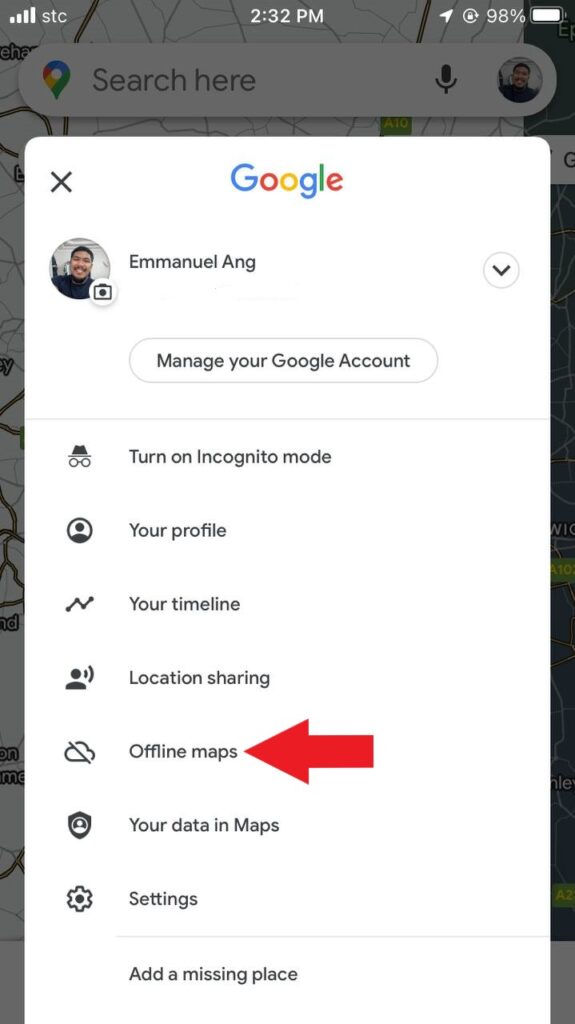
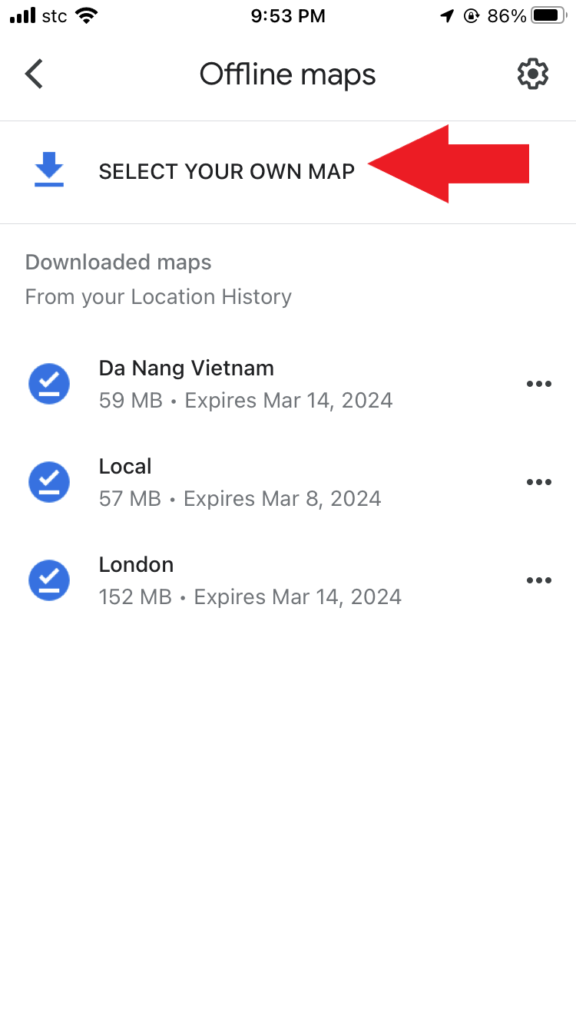
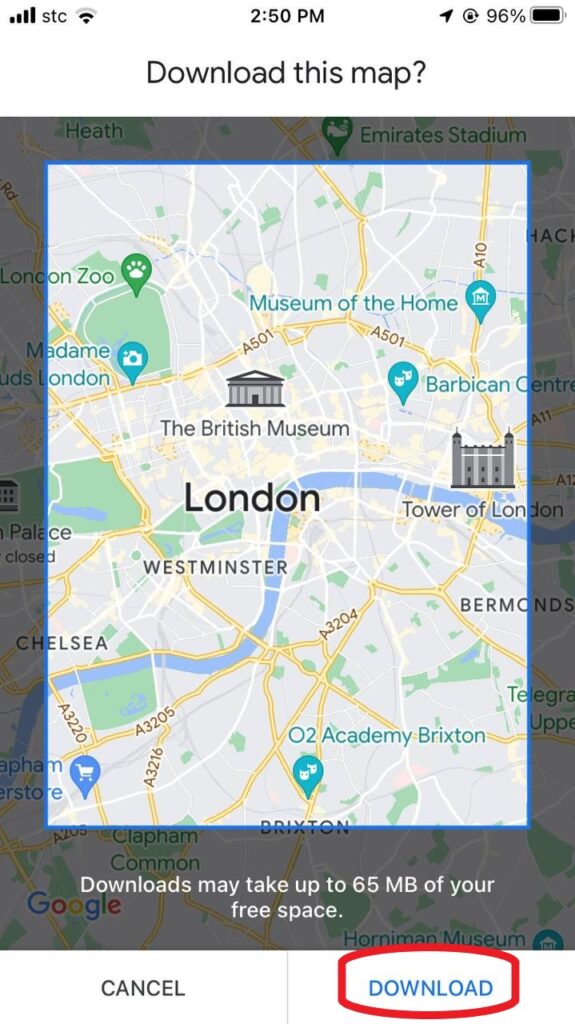
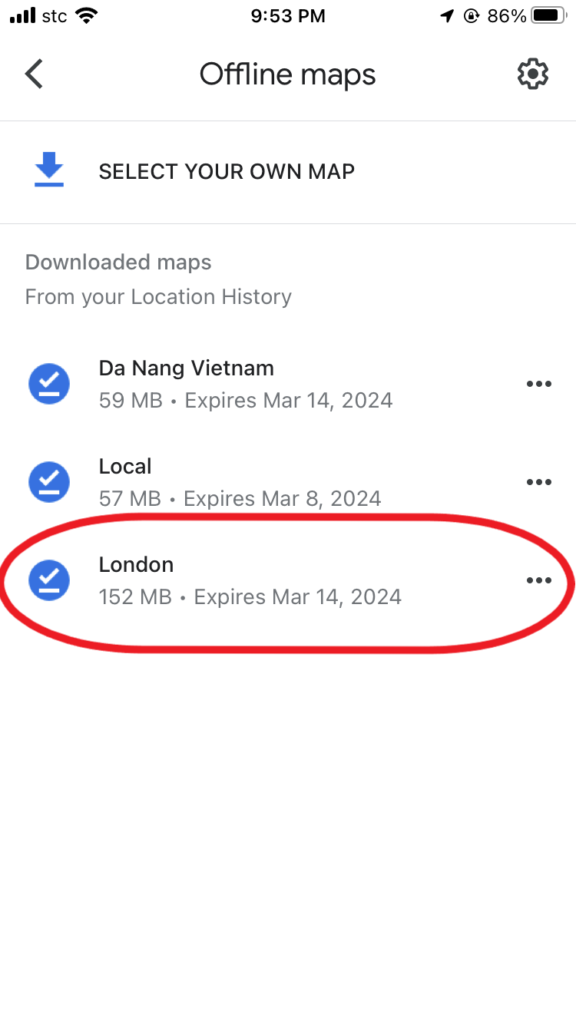
One notable feature that’s worth knowing is the offline maps. By downloading the map of your destination, you can use it for directions even if you’re cut off with the internet. So you can walk around the city and not worry about going in circles.
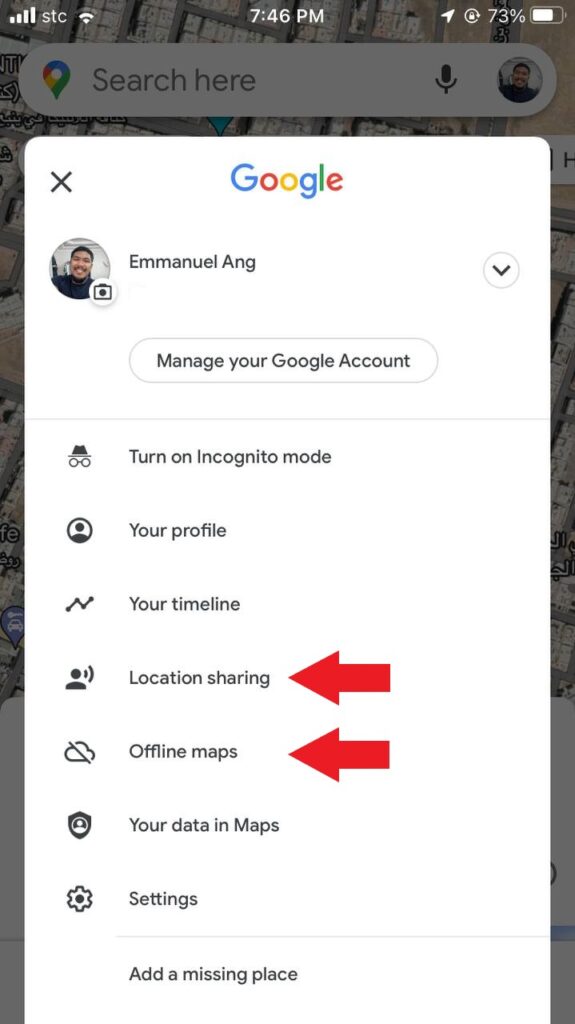
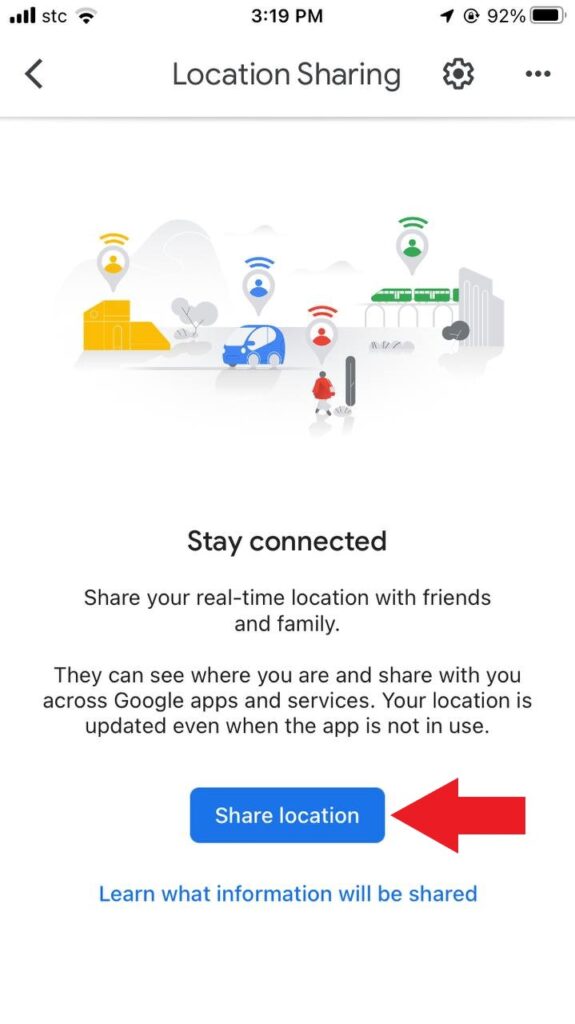
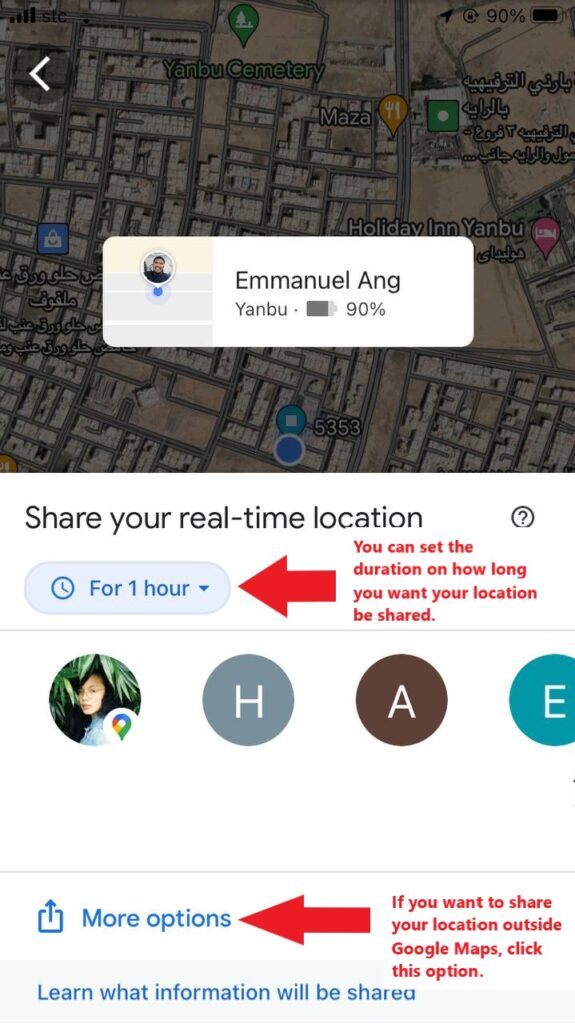
In addition, for security, let your family and friends know where you are at the moment by using location sharing. Google Maps will show them where you are in real-time. In this way, it lets them know that you’re safe when you’re visible in the app.
Quick How To Use Google Maps
Going to a destination
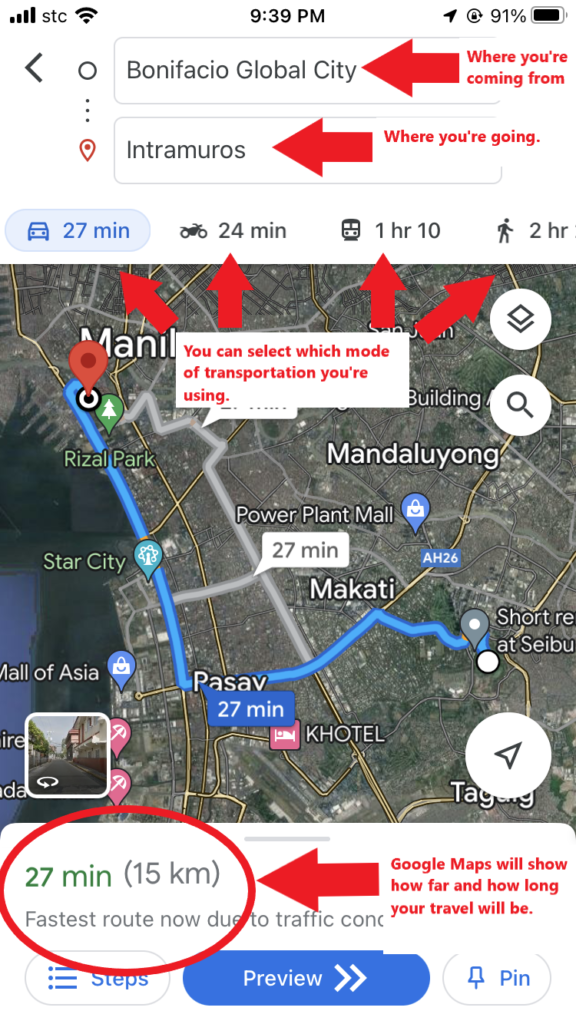
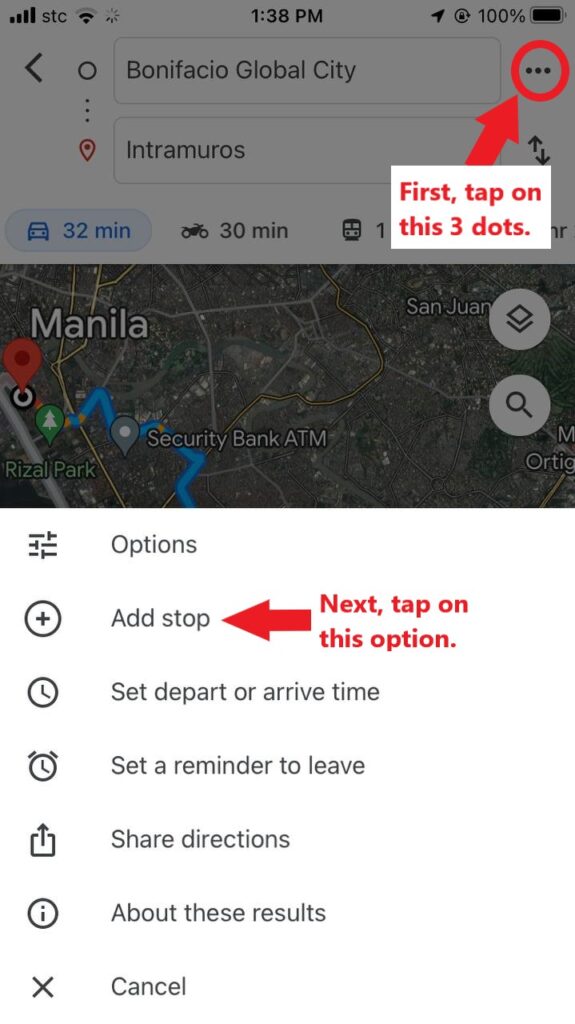
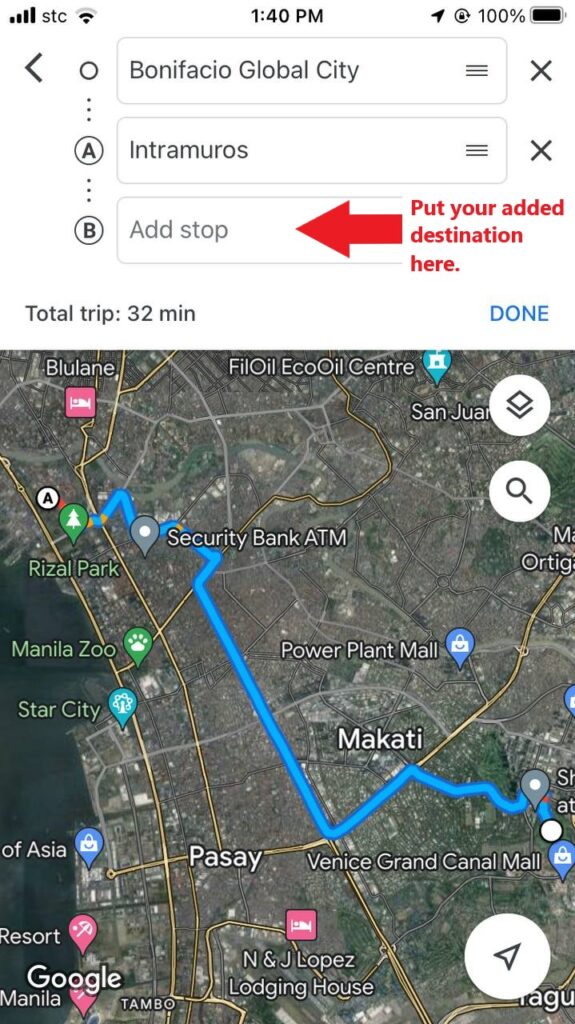
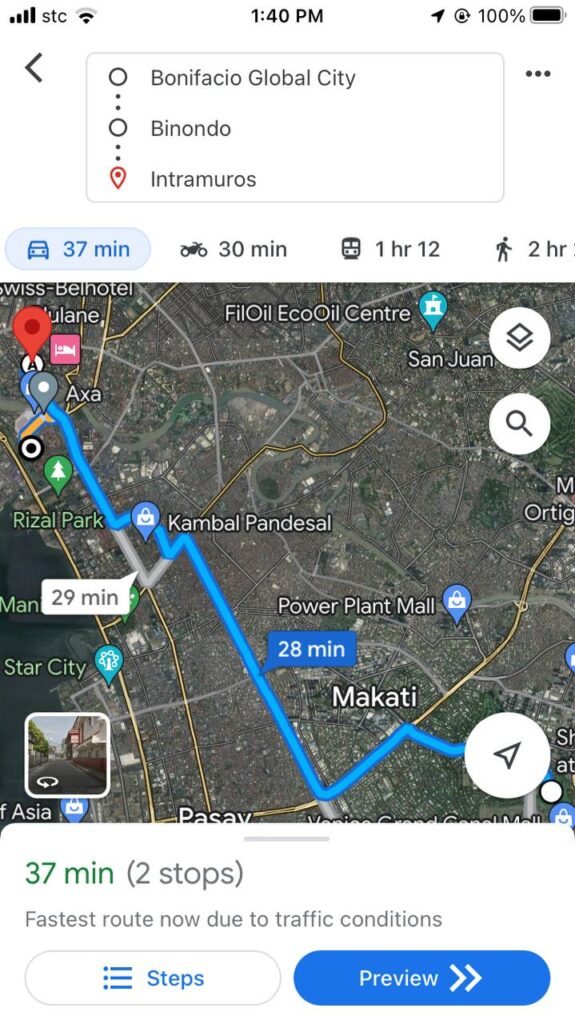
Google Maps is not just going from Point A to Point B. It can also do Points A to B to C.

Downloading a map
Location Sharing
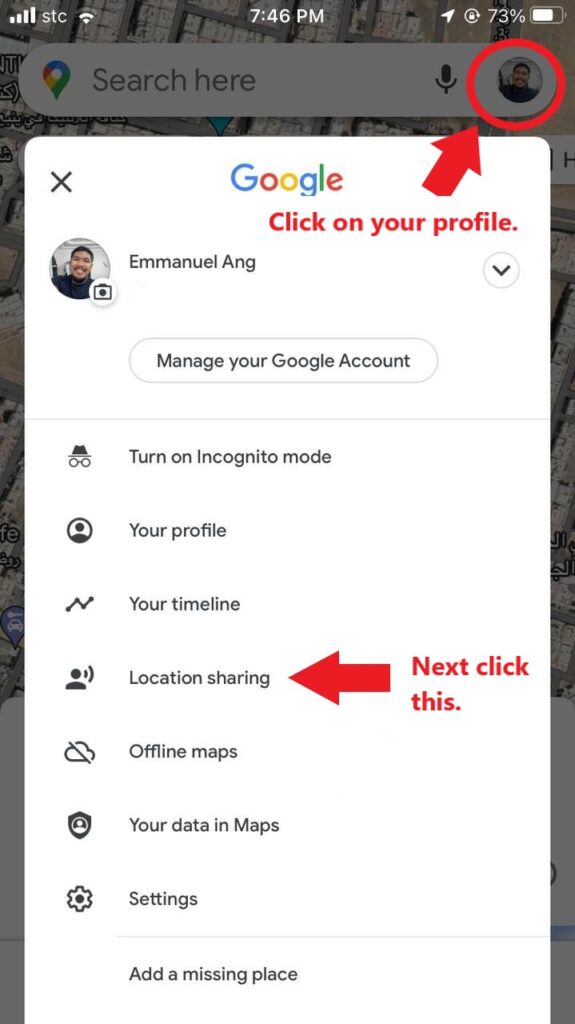
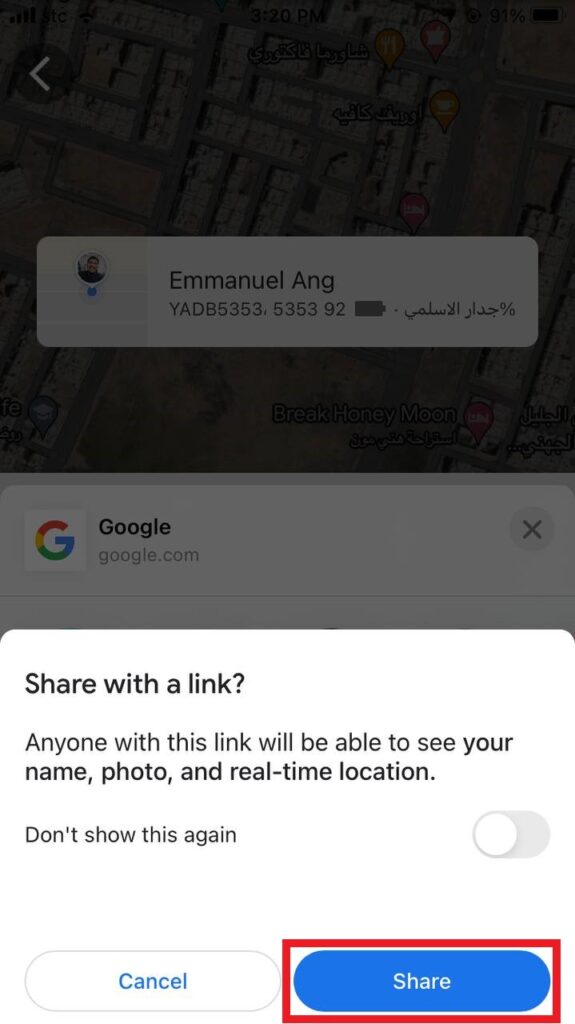

Be cautious about who you’re sending the link with. Make sure that you’re only sharing it with people you know or close to you.
Exit the app, send the link to your friends and family across various platforms. It could be via email, WhatsApp, Messenger, etc.
You can download the Google Maps here for iOs or Android.
Make Your Travels 10x Easier
Travelling has never been easier with these apps.
Harnessing the technological advancement of this century on travel will help you save time and money. It helps keep your journey more relaxed and prevents you from hassles. These apps can take your trips and experiences to new heights. It also deals with things that you don’t have time or energy to figure.
Embracing the advancing technology doesn’t have to be scary or strange to you. It doesn’t need to be intimidating as well. Consider these apps as a tool that help, not a challenge to conquer.
Travel apps take the pain out of travel and help you focus on what’s important: to relax and have fun!